

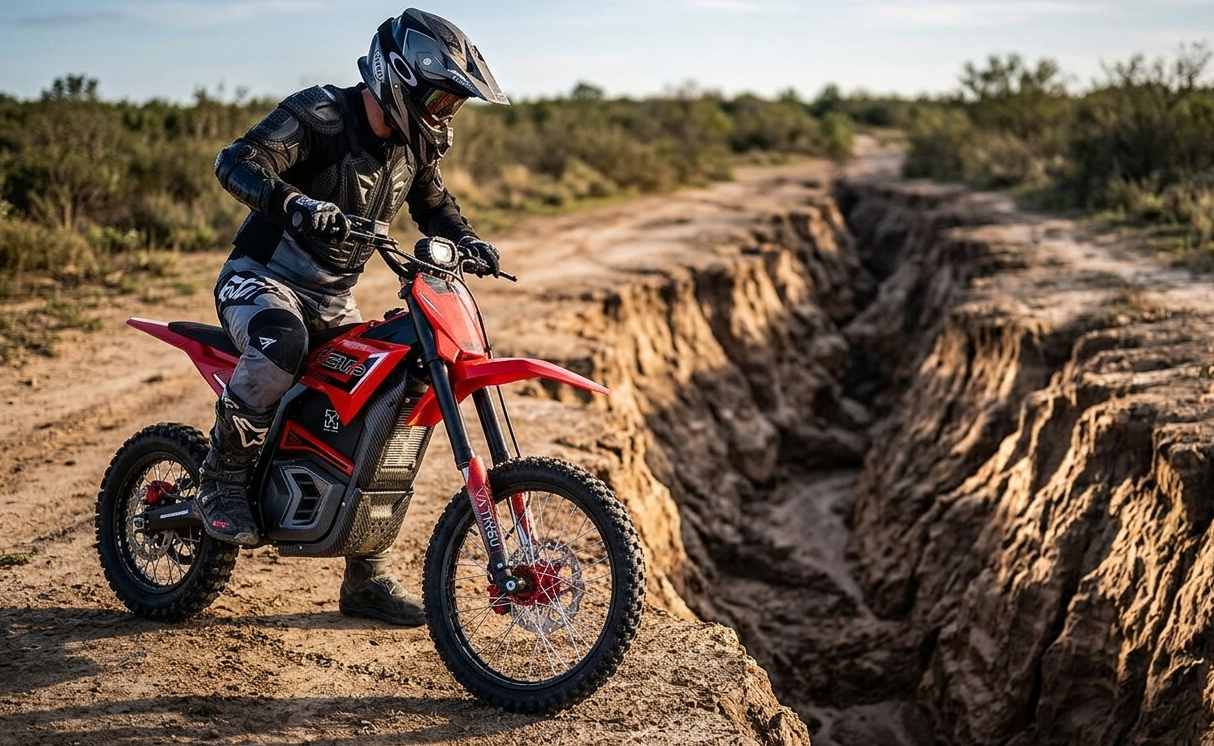
Electric Dirt Bike Ruts and Washouts: Line Choice and Recovery
A rut or washout presents four choices: stay in the channel, cross at a supported point, use a designated open alternate or turn back. Choose before the front wheel commits by checking the floor, edges, clearance, exposure and exit.
Ruts and washouts require different decisions. A rut is a channel that may guide or trap the tires; a washout is erosion that narrows or removes the supporting tread.
An electric dirt bike adds immediate motor response, possible off-throttle drag, machine weight and battery reserve to the decision. This guide provides an inspection sequence, line-choice matrix, techniques for longitudinal and crossing ruts, and a power-off recovery process.
Quick Answer: Choose the Line With a Stable Exit
Choose the line that supports both wheels from approach through exit. A smooth entrance is not enough if it leads to a deeper channel, weak edge, buried obstacle or blocked exit. Confirm ground support, clearance and an exit onto stable tread.
Slow down before the feature, not in it
Get your speed off while the bike is upright, and both tires are still on ground you can predict. Braking hard at a loose lip is how front wheels get deflected sideways. Finish the braking early. Roll in.
Keep turning back on the table
A legal trail is not automatically a rideable trail today. Worsening erosion, hidden depth, steep exposure, a blocked exit: any one of those justifies retreat, and the choice has to be made before you enter a section that eliminates turnaround space. Make that call early. Turning around is a route decision. Make it while stable ground and enough space remain.
Stay In, Cross, Bypass, or Turn Back
Do not reduce every rut to a commit-and-throttle instruction. A storm-damaged channel may change depth, width, floor condition and exposure beyond the visible entrance. Use the four decisions below in order.
- Stay in it when the channel runs with the trail, the floor is firm, clearance is adequate, and the exit is visible.
- Crossing works where the rut cuts across your route and the approach, both edges and the landing all hold weight.
- A designated alternate, only where one exists and is currently open. Posted and mapped, not improvised.
- Turn back when support, depth, or visibility cannot be verified, or when recovery would put a person below a bike that can slide.
If the bike stops in a rut, switch it off before repositioning or lifting it. Recovery deserves its own plan because wheelspin can deepen the channel, damage the trail and destabilize the motorcycle.
What an Electric Drivetrain Changes in a Rut
Torque delivery is the obvious difference. It is not the only one that matters once the ground is broken.
|
Electric factor |
What it does in a rut or washout |
Handling response |
|
Instant torque |
A small throttle movement becomes wheelspin on a soft floor, which digs the rut deeper |
Meter it. Progressive input only, never bursts |
|
Regenerative drag |
Closing the throttle can brake the rear wheel just as it crosses a loose edge |
Know your model setting before the feature, not during it |
|
Mass low in the frame |
Feels planted rolling, and is hard to lift once it is lodged on a slope |
Choose the recovery position before you enter |
|
Near silence |
Riders around a blind bend do not hear you stopped in the channel |
Stop where you can be seen. Use the horn on blind approaches |
|
Range as distance from help |
A flat pack deep in a wash turns a stuck bike into a long walk out |
Budget return charge before committing to a damaged section |
|
Sealed housings |
A documented IP rating covers only the identified enclosure under defined test conditions, not a safe water depth |
Treat moving water in a washout as a turn-back signal |
So e-moto trail traction is mostly a throttle-discipline question. Nothing more exotic. Grip that a gas bike finds through clutch slip has to come out of your right hand instead.
First, Confirm the Route Is Open to Your Motorcycle
Rideable and legal are two separate tests. Legal comes first. A route can look completely passable while being closed for the season, restricted to a different vehicle class, or shut by a temporary order after storm damage. Sort that out before you assess a single rut.

Check current motorized-route information
Start with the applicable Motor Vehicle Use Map, the official OHV map, land-manager notices, posted signs, and any temporary closure order. The Forest Service is blunt about how this works: routes not shown on the MVUM are not open to public motor vehicle travel, and the map gets reissued annually, so a download from last season is not current information.
On BLM ground, the designation itself decides it, since land is classified open, limited, or closed, and limited means designated routes only. Dates matter as much as lines. Saturated ground and fresh washouts produce short-notice restrictions. Old GPS tracks and rider videos give you context. Not permission.
Never build your own bypass
Riding around a washout widens the trail, crushes vegetation, accelerates the erosion that created the problem, and can put you in an area closed to motor vehicles entirely. Use an alternate only when it is designated and open.
Signed, mapped, current. If no legal passage remains, turn back and report the damaged section to the land manager, because that report is how a trail gets repaired instead of closed.
Read the Feature Before You Pick a Line
Stop on stable ground where you can look the section over without blocking the trail or standing on a weak edge. Work out three things: how the feature runs, what holds its surface up, and where it ends. Water, shadow, vegetation, and loose debris all hide real depth, and every one of them makes a feature look shallower than it is. Assume worse.

Ruts that run with the trail
A directional rut follows your intended line. Sometimes that is a gift, a continuous channel that tracks the bike for you. Sometimes it narrows a hundred feet in until a tire, a footpeg or something lower loses clearance. Check the floor first. Firm soil, mud, roots, rock, steps, standing water. Then follow the channel with your eyes through every bend and confirm the walls and the exit still hold up where you cannot easily see.
Ruts that cut across it
A crossing rut or erosion channel runs at an angle to your route. You need firm ground in four places. Approach, near edge, far edge, landing. Pick the supported path from the shape of the feature and the traction available rather than from a memorized crossing angle. No fixed angle works. What the far side is made of decides it.
Partial and full washouts
A partial washout leaves some tread. A full washout has removed the usable connection between where you are and where the trail continues. Watch for undercut edges, loose fill, flowing water, drop-offs, and cracks running parallel to the edge, which is what soil does shortly before it lets go. Width is not strength. Remaining tread can measure wide enough and still fail to carry a loaded motorcycle.
The Line-and-Recovery Checklist
Run this from a stopped position before you enter anything. Four checks, in order. Walking the feature helps when it is legal to do so, and the ground can be approached without exposure. If any part of the line or the recovery plan is still a guess when you finish, keep the retreat option.

The approach
Enough predictable ground to shed speed and align both wheels? Note slope, camber, soil firmness, loose rock, roots and standing water, plus anything that would compromise braking or steering in the last few feet. Then check the trail. Riders come the other way, and on a quiet electric bike they will not hear you first.
The middle
Decide which of four things the floor will do. Support, guide, deflect, trap. Look for narrowing walls, edges at peg height, buried rock, soft patches, and any point where the bike could stop somewhere you have no footing. Then weigh bike width and ground clearance against the available channel, honestly.
The exit
Find a visible exit that carries both wheels and gives room to rebalance. Then look past it. A second rut, loose fill, a tight turn, an obstacle or an exposed edge immediately beyond changes the whole answer. A clean entrance buys nothing when the exit is the problem.
The recovery space
Pick the spot where you would stop, dismount, retreat or take help. Consider footing, the mass of the bike, the distance to assistance, and whether pulling it free would drag it toward a drop. BLM tells visitors to be prepared for self-rescue because many riding areas have no cell signal. Plan for that. If the only available recovery position puts a person downhill of a bike that could slide or roll, the decision is already made.
Rut and Washout Decision Matrix
Six situations cover most of what a rutted OHV trail throws at you. Read across.
|
Observed condition |
Low-risk checks |
Possible choice |
Turn-back signal |
|
Firm rut running with the trail |
Width, depth, floor, exit, clearance |
Stay in the rut |
Narrows past clearance, or ends at an obstacle |
|
Shallow rut crossing the trail |
Supported approach, far edge, landing |
Cross at a controlled line |
Hidden depth, soft edge, exposed landing |
|
Multiple parallel ruts |
Exit, surface firmness, room to change lines early |
Take the most continuous line |
Every option traps a wheel or lacks an exit |
|
Trail narrowed beside a washout |
Remaining tread width, edge support, exposure |
Proceed only if clearly supported |
Undercut edge, drop-off, no recovery room |
|
Legal designated alternate |
Signs, current map status, surface stability |
Use the authorized alternate |
The bypass leaves the designated route |
|
Unclear or deteriorating feature |
Safe stopping and turnaround space |
Stop and inspect |
Conditions cannot be verified at all |
Consequence is part of difficulty
Depth and width do not measure a feature on their own. The same narrow channel is trivial on flat ground and serious along a steep drop-off. Same dirt. What changed is the cost of one mistake.
Rider fatigue, bike mass, footpeg clearance, and physical fit move the line as well, so when an error carries severe consequences, treat the feature as hard regardless of how it looks. Rain ruts on hill climbs like Bloody Jersey at Wildomar OHV are known for exactly this. Wheel-swallowing channels on a slope, with no easy line back down.
How to Ride Ruts on an Electric Dirt Bike
Keeping ground under both wheels from entry to exit is the entire technique. Momentum is not it. Momentum is what you spend once the line is already good.
Look through to the exit
Eyes far down the usable path. Not the front tire. Not the wall beside your knee, which is exactly where the bike goes if you keep looking at it. Looking at the exit holds your balance and keeps the bike tracking.
Keep inputs smooth
Progressive throttle, all the way through. Abrupt acceleration, hard braking, sharp steering corrections and aggressive regenerative drag will each break traction that was already marginal, spin the rear wheel, or upset the chassis inside a channel too narrow to correct in. That is the skill.
Let the bike move under you
Balanced standing or a light seated position, chosen for your speed, your peg clearance and your own capability. Arms and legs relaxed. Absorb the sideways deflections rather than fighting the front wheel straight, because a rigid grip transmits every wall strike into the bars and out of your hands.
Leave before the rut turns unrideable
Plan the exit early if depth is increasing or the walls are closing in. Change lines only where the wall and the ground beside it are firm enough to climb onto. Wait until the channel traps both wheels and the decision now belongs to the trail. Not to you.
Crossing a Rut Without Trapping the Front Wheel
One failure mode dominates here. The front wheel drops in, or glances off the near wall, and the bike goes where the groove points. Everything below prevents that.
Set direction before the edge
Steering, line, and speed all get settled while you are still on flat, stable approach ground. Set the trajectory early so both wheels arrive balanced and upright. Not at the lip. Corrections made there are the ones that fail.
Drive across, do not lunge
Steady, progressive power through the crossing. Keep forward drive without the throttle burst that spins the rear tire, lifts the front too far, or steers the frame into the channel wall. Smooth beats forceful.
Confirm the far side holds
Verify the landing is firm, clear of hidden debris and wide enough for both tires before you start. Loose fill, collapsing soil or a drop you cannot see means you do not cross. Look, then go.
Off-Road Motorcycle Washout Safety: Reading the Turnaround
Washed-out trail line choice sometimes has no correct line in it. Recognizing that is the skill, and the recognition happens early. Well before the edge.
Undercut and collapsing edges
Water hollows soil out from beneath the surface, which leaves a thin crust that looks like trail and behaves like a lid. Undercutting means stop. Crumbling banks mean the same thing, and it means stop where you are, not two steps forward for a better view. Tread width tells you nothing about what sits underneath it.
Exits you cannot see
Blind drops. Dense vegetation, moving water, deep debris. Each of those hides something that traps a wheel or removes your recovery options, so never ride into a washout whose far end is not visible from a safe position.
The last wide spot
Catch deteriorating conditions early. Stop at the last stable, wide place on the trail. Turning around there preserves the return line and avoids a manual turnaround on an eroded slope with a heavy bike, which is genuinely dangerous and which riders end up doing because they went two hundred feet too far.
Electric Dirt Bike Rut Recovery Without Adding Power
Recovery starts by taking the throttle out of the equation entirely. Adding power to a stuck bike spins the rear tire, deepens the channel it is already sitting in, and can walk the machine toward an exposed edge. Four steps, in order.

Make the motorcycle inert
Follow the model shutdown procedure in your user manual before you touch or reposition anything. Power off, confirmed off. Then keep hands, clothing and any recovery strap clear of the chain, belt, sprockets, wheels and everything else that turns, because a bike that comes free suddenly puts all of it in motion.
Stabilize yourself first
Firm footing before you lift or pull anything. Yours and theirs. Never stand downhill of a motorcycle that could slide, roll, or tip. Check that helpers have stable stances and a clear escape path too. A trapped wheel releasing is abrupt, and the bike moves as one unit when it does.
Reduce the load
Take off approved, easily detachable cargo when it is safe to reach. Do not open electrical housings, disconnect high-voltage components, or attempt an improvised battery removal at the trailside. UL Standards and Engagement notes that mechanical shock from a bump, drop or fall raises the risk of damage to a lithium-ion pack, and a damaged pack is the one that enters thermal runaway. The manual sets the handling limits. Stay inside them.
Call for help, or retreat
Stop if recovery needs a lift beyond your capability, pulls the bike toward exposure, or would tear up more trail. Request help. Give accurate coordinates, the nearest marked junction and a plain description of the terrain, then confirm whether responders can physically reach you and how the bike gets transported out. Once it is free, retreat anyway if the feature still has no safe line through it.
After a Slip, Stall, or Hard Strike
Some losses of grip cannot be saved. Accept the first one. What you are protecting against is the second abrupt movement, particularly near a washout, a drop-off or an unstable rut wall.
The panic input
A sudden throttle opening spins the rear. Grabbed brakes or a sharp steering correction extends a slide or deflects the front. Snapping the throttle shut may add regenerative drag, depending on your model and its current setting. Keep inputs measured. If the bike is still steering, take the clearest route to open, stable ground rather than forcing it back onto the original line across a soft edge.
Stop if anything has changed
After a hard strike or a fall, stop somewhere safe and run the manual inspection. Controls, bars, wheels, tires, brakes, guards, drivetrain, suspension, battery enclosure, charging area, visible cabling. Do not continue if braking, steering, power delivery, sound, vibration or a displayed warning differs from before. Off-road riding is exactly the vibration-and-impact environment that battery-safety guidance flags, so a hard hit on the enclosure is an inspection trigger. Inspect it.
Rutted OHV Trail Setup: Model Guidance Beats Rules of Thumb

Setup begins with documented model guidance. No single tire pressure, suspension setting or ride mode suits every motorcycle, rider, tire, load and surface.
Start from the manufacturer baseline
Inspect tire condition and use the manufacturer cold-pressure guidance for the tires actually fitted. Cold, before riding. Michelin is specific on method: take the figure from the owner manual or the vehicle information plate rather than the maximum stamped on the sidewall.
Then check wheels, controls, suspension movement, drivetrain, and the approved ride-mode or regenerative-braking settings. Resolve damage and looseness first, since replacement parts and accessories cost less than a recovery. Abnormal operation is not a trail problem to solve later.
One approved change at a time
Where the manual permits an adjustment, write down the starting position and change one variable. Retest somewhere legal and low-consequence. Move pressure, suspension and control settings together, and you lose any ability to tell which one helped.
Fit, mass and recovery capacity
Recovery depends partly on whether you can reach the controls, shift between seated and standing, hold the bike up, and manage its mass on uneven ground.
Clearance matters. So does predictable control response. If you are weighing the EM-5 Pro for terrain like this, compare its approved specifications against your own fit, skill, recovery capacity, and legal riding ground, in that order. Specifications do not substitute for training or line choice.
Practice on a Feature That Cannot Hurt You
Build rut skills where a mistake costs nothing, long before you need them beside a remote washout. A shallow rut or a training obstacle on authorized ground works: firm surrounding soil, a visible open exit, no drop-off, and room for a spotter to stand clear.
Practice the decisions as well as the riding: look through the feature, stop before commitment, follow a channel only while the exit remains supported, and shut the motorcycle down before a planned manual recovery. Formal off-road coaching can add supervised feedback on authorized, low-consequence terrain; the Motorcycle Safety Foundation's DirtBike School is one current option.
Evidence and Limits Behind This Guidance
The guidance separates legal access, riding technique, model documentation, and recovery limits so that each claim can be checked against the appropriate source.
Land-manager and training sources first
Legal-access claims come from USDA Forest Service MVUM guidance and BLM travel-management designations. Technique framing follows established off-road rider training rather than trail folklore.
Model documentation over universal numbers
Every setup instruction points back to your manual and the manufacturer figures for your fitted tires. No universal PSI. No universal crossing angle either, and no speed target. Those numbers do not exist honestly across bikes, riders, and surfaces.
Scope Boundaries
The scope excludes deep mud, clay, wet roots, and trail-rating systems because each changes the traction and recovery problem. Water-resistance ratings are also not used to infer an immersion depth or permission to cross standing or moving water.
Make the Exit the Deciding Factor
Assess the whole feature, first few feet through exit. A defensible line supports both wheels, clears the bike, ends on stable ground, and leaves a realistic recovery option when it does not go to plan. That is the test. Legal access, bike mass, remaining range, your own fatigue, and the cost of a mistake all outrank the urge to protect momentum, and turning back stays correct whenever support or visibility is uncertain.
Work the line-and-recovery checklist first. Then, if you are shopping for terrain like this, look at the EM-5 Pro or compare the full electric dirt bike lineup against your fit, the mass you can recover alone, and the legal ground you actually ride. The right motorcycle supports a good plan. It does not make a damaged trail safe.
Frequently Asked Questions
Is it better to stay in a rut or cross it?
Neither, always. The feature decides. Stay in when the channel is firm and continuous, clearance is adequate, and the exit is visible; cross only where the approach, both edges, and the landing hold weight. Crossing asks for firm ground in four places, and one soft edge is enough to end it.
When should you turn back at a trail washout?
Turn back when any of these conditions is present:
- The outer edge is undercut, cracking, or slumping.
- Loose fill or flowing water is undermining the tread.
- The exit cannot be seen from stable ground.
- There is no safe stopping, turning, or recovery space.
What should you do if an electric dirt bike gets stuck in a rut?
Shut it down first, then move it manually. Four steps, in order: follow the model shutdown procedure and confirm drive power cannot engage, get secure footing, remove approved detachable cargo only, then request help. Throttle is not a recovery tool, since spinning the rear tire only deepens the channel.
Does instant electric torque help in ruts?
It can help only when the surface and line already support the motorcycle. Progressive torque may maintain movement, while an abrupt throttle input can break rear-tire traction and deepen the rut. The effect depends on the selected mode, tire, load, surface, and rider input, so practice smooth delivery on low-consequence terrain first.
Can I ride my electric dirt bike in the rain?
Only if the route remains legally open and the model manual permits the expected exposure. Check current land-manager notices because saturated ground can trigger short-notice restrictions. IPX6 describes a controlled water-jet enclosure test, not immersion or a safe flood depth, so a flooded washout remains a turn-back condition.
How do you wash an electric dirt bike after a rutted ride?
Off, cool it, then follow the manual for your model. Use only approved cleaners, tools and water methods. Do not use pressure, spray, or cleaning fluid on any area the manual restricts. Five areas are the usual risk points: connectors, housings, seals, bearings, and the charging port. Clear debris gently, dry it, then inspect brakes, tires, drivetrain and visible cabling.
Sources
- USDA Forest Service, Motorized Vehicle Use Maps (MVUM) (2026)
- Bureau of Land Management, Travel and Transportation: OHV Area Designations (2026)
- Motorcycle Safety Foundation, DirtBike School (2026)
- Michelin, Check Your Motorcycle Tire Pressure (2026)
- UL Standards and Engagement, E-mobility Devices (2026)


Looking for something else?

Fit-First Electric Dirt Bike for Women: Lightweight Models & Seat Height Guide
LEARN MORE
Electric Dirt Bike Weight Limit: What Riders Over 200 lbs Need to Know
LEARN MORE
Electric Dirt Bike for Farm Use: Practical Fencing, Livestock & Land Management Guide
LEARN MORE
Night Riding on an Electric Dirt Bike: Lights, Safety & Setup Guide
LEARN MORELooking for something else?

Mid-Drive vs Hub Motor Electric Dirt Bike: Which Is Better for Off-Road Riding?
LEARN MORE
Electric Dirt Bike vs ATV: Which Is Better for Off-Road Beginners?
LEARN MORE
Electric Dirt Bike Battery: Voltage, Amp-Hour Range & Replacement Tips for Off-Road Riders
LEARN MOREYou may also like
VALTINSU EM-5 Off-Road Electric Dirt Bike
VALTINSU EM-5 Pro Off-Road Black Electric Dirt Bike
VALTINSU EM-5 Pro Green Electric Dirt Bike
Further reading

Electric Dirt Bike Steep Descent Technique: Braking and Body Control

Electric Dirt Bike Whoops Setup: Suspension, Stance and Timing

Electric Dirt Bike on Clay Soil: Setup, Technique and Cleanup
