How to Bleed Electric Dirt Bike Brakes Safely
To bleed electric dirt bike brakes safely, identify the exact brake model and required fluid, then follow that brake manufacturer's current procedure and bleed-kit instructions. A generic sequence is not reliable across mineral oil and DOT fluid systems.
Never mix mineral oil with DOT brake fluid, and never substitute one for the other. Incompatible fluid can damage seals and leave the brake unsafe.
Begin by confirming whether the brake actually needs bleeding, because weak braking can come from the hydraulic circuit, friction surfaces, alignment, or a mechanical fault. Then identify the exact brake and approved fluid before opening a port.
Treat brake work as safety-critical. If the lever remains spongy, fluid leaks, a fitting is damaged, the rotor or pads are contaminated, or the correct procedure is unavailable, stop and use a qualified technician.
Brake bleeding is model-specific. Identify the exact lever, caliper, approved fluid, bleed kit, block, service position, and closing sequence before opening the system.

Confirm the brakes need bleeding. Identify the brake model and its specified fluid. Get the matching bleed kit. Protect the pads and rotor. Follow the brake maker's own sequence and service position. Then validate the brakes before riding.
There is no single universal bleed method. Brake manufacturers publish model-specific procedures because port order, service position, fluid, tools, and closing steps differ.
Identify the Exact Brake System First

Find the brake manufacturer, the model, the approved fluid, the correct bleed kit, and the official procedure. All five, before any tool touches a bleed port.
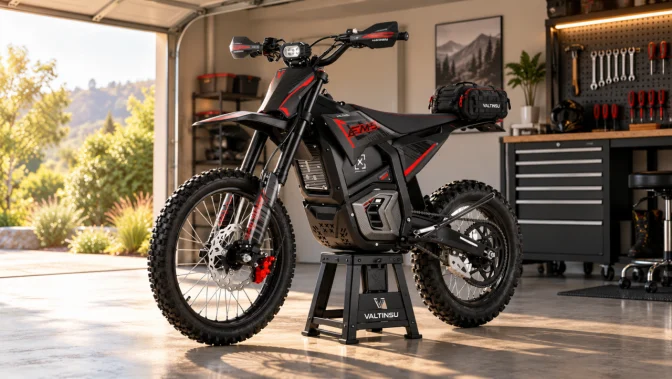
Worth knowing for Valtinsu owners: every off-road model in the range uses front and rear hydraulic disc brakes, but the supplied manuals do not name the brake maker or state the fluid. That means the marking on your own lever or caliper is your primary evidence.
Protect the Friction Surfaces
Pads and rotors must stay completely free of brake fluid, oil, grease, and dirty tools. SRAM states plainly that fluid or oil on the pads indicates contamination and that the pads must be replaced.
Follow the Brake Manufacturer's Sequence
Bleed direction, port order, lever position, and air-release technique vary. Use the procedure for the exact brake model rather than a generic top-down or bottom-up recipe.
Test Before Returning to the Trail
A firm lever is not proof of a safe brake. Check for leaks under pressure, correct wheel installation, rotor clearance and consistent braking at low speed first.
Decide Whether Your Brakes Actually Need Bleeding

Start here, because bleeding a system that has a different fault wastes fluid and hides the real problem. Several conditions can make the lever feel wrong.
The table sorts symptoms by what they usually mean. Read your own symptom first, then decide whether a bleed is even the right job.
|
What you notice |
Most likely cause |
Will bleeding fix it? |
|
Lever feels soft and springy, firms up after several pulls |
Air in the hydraulic circuit |
Usually yes |
|
Lever travel has grown, but feel stays firm |
Worn pads, piston position or lever reach adjustment |
Usually no |
|
Firm lever but weak stopping power |
Contaminated or glazed pads, rotor condition, alignment |
No |
|
Lever sinks slowly while held under steady pressure |
A leak at a fitting, hose, lever or caliper seal |
No, repair first |
|
Feel changes after the bike is stored on its side or tilted |
Air moving through the circuit |
Yes, and it is good evidence |
|
Brakes fine cold, soft after a long descent |
Heat and degraded or moisture-laden fluid |
A full fluid flush, not just a bleed |
|
System was opened for hose or lever work |
Air introduced during service |
Yes, bleeding is required |
|
Squeal or vibration with normal lever feel |
Friction surfaces or caliper alignment |
No |
Spongy or Compressible Lever Feel
Air compresses and fluid does not. So when bubbles are in the circuit, part of your lever stroke squeezes air instead of moving pistons.
The classic tell is a lever that gets firmer if you pump it a few times, then goes soft again after it rests.
Lever Travel Has Increased
Longer travel can mean air, but it can equally mean worn pads letting the pistons sit further out, or a lever reach setting that has drifted.
Measure pad thickness before you assume air. SRAM builds this into its own troubleshooting order: check and measure the pads before bleeding the system.
The Brake System Was Opened
Hose replacement, lever swaps, caliper work, or fitting changes all expose the circuit to air. Those jobs normally require a bleed as part of the procedure.
SRAM goes further on one point: bleed before reinstalling the pads, because fitting pads first risks contaminating them and can lead to brake failure.
Braking Changes When the Bike Is Tilted

A lever that feels normal in one orientation and soft after the bike or lever is repositioned is useful evidence that air may be moving to a different high point in the circuit.
Shimano's dealer documentation explains the mechanism. If the machine is turned upside down or laid on its side, air bubbles in the reservoir can travel to the calipers, and brake operation must be checked afterward.
If firmness disappears when you return the lever to its riding angle, air is still somewhere in the circuit. Reassess the bleed rather than riding it.
A firm lever with weak braking usually points to contaminated or glazed pads, rotor condition, alignment, or bedding—not air in the hydraulic circuit.
A firm lever with poor stopping power is rarely an air problem. Look at pad condition, contamination, rotor wear and caliper alignment instead.
Know the Difference Between a Bleed, a Burp, and a Fluid Flush

A bleed, lever burp, fluid flush, and component repair solve different problems. Choose the job from the symptom and the exact brake manual.
|
Job |
What it actually does |
When it is the right choice |
|
Brake bleed |
Removes air from the hydraulic circuit |
Soft or compressible lever, or after the system was opened |
|
Lever bleed or burp |
Clears a small amount of air near the lever only |
Minor sponginess, and only if your brake maker documents it |
|
Fluid flush |
Replaces the fluid throughout the circuit |
Old, dark, or moisture-laden fluid, or a service interval |
|
Brake repair |
Replaces a leaking or damaged part |
Any leak, damaged hose, failed seal or cracked body |
Brake Bleed
Air removal using the brake maker's approved procedure. It does not renew the fluid throughout the system unless the procedure is written as a flush.
Lever Bleed or Burp
Some systems allow a short procedure at the lever to release trapped air without a full flush. Whether yours does, and at what lever angles, is model-specific.
Fluid Flush
This replaces the fluid rather than only chasing bubbles. It is the right job when fluid comes out dark or cloudy, which points to moisture or contamination.
Brake Repair
A leaking hose, damaged fitting, worn seal, cracked lever body, or failed caliper needs replacement. No amount of bleeding corrects a part that cannot hold pressure.
Identify Your Brake Fluid Before Opening the System

This is the step where a mistake costs you a brake set. Fluid families are not interchangeable, and the two in common use attack each other's seals.
Because the supplied Valtinsu manuals do not state a fluid type, confirm the approved brake fluid with Valtinsu support before you open anything, quoting your model and order number. Keep the written answer. Guessing here is not a small risk.
|
Property |
DOT fluid (DOT 4, DOT 5.1) |
Mineral oil |
|
Chemical family |
Glycol ether based, regulated under a federal standard |
Hydrocarbon based, not a regulated grade |
|
Absorbs water from air |
Yes, which lowers its boiling point over time |
Far less, but it still ages and picks up contaminants |
|
Effect on paint |
Damages painted and printed surfaces |
Much gentler, still wipe it off |
|
Common on |
Some SRAM and Avid systems, many motorcycle systems |
Shimano, Magura, TRP and some SRAM systems |
|
Interchangeable? |
Never. Wrong fluid swells and destroys seals |
Never. Wrong fluid swells and destroys seals |
Identify the manufacturer and model on the lever and caliper, then use that maker's current service manual. The bike's general owner manual may not specify the brake fluid or bleed procedure.
The lever body or reservoir cap may identify the fluid, but confirm the marking against the brake maker's own service documentation.
The DOT grades are a federal specification, not a brand. Under 49 CFR 571.116, every container must carry the grade and a warning to follow the vehicle maker's recommendation when adding fluid.
Mineral Oil and DOT Fluid Are Not Interchangeable
Park Tool puts it in two sentences worth memorizing: never use DOT fluid in brakes designed for mineral oil, or the reverse, and never share bleed kits between the two.
That second half catches people out. A syringe that once held DOT fluid carries enough residue to contaminate a mineral oil system.
Do not infer fluid from brand alone. Product lines can include different fluids, and aftermarket brakes may not match the original build.
Here is the fact that breaks every brand-based rule of thumb you will read elsewhere. SRAM publishes two separate bleed manuals, one for its DOT fluid brakes and one for its mineral oil brakes.
Its own instructions say to use DOT 4 or 5.1 in the DOT systems and a specific mineral oil in the mineral oil systems. So "SRAM means DOT" is simply wrong as a rule. Model generations differ too.
Use a new, sealed container of the exact approved fluid. Do not reuse extracted fluid; dispose of it according to the product instructions and local rules.
Shimano's dealer manual is explicit: use oil from a freshly opened container, and never reuse oil drained during a bleed, because old oil may contain water that causes vapor lock.
Reused fluid can carry air, moisture, debris, or mixed chemistry back into the brake. Fresh approved fluid removes that uncertainty.
Gather the Correct Brake-Specific Tools

This is a matching exercise, not a shopping list. Fittings and thread sizes are specific to the brake.
A Brake-Compatible Bleed Kit
Syringe threads, funnels, adapters, hose sizes and clamps all have to match your exact system. An almost-fitting adapter leaks air in while you work, which is why some bleeds never come good.
The Correct Bleed Block
A bleed block holds the pistons in the service position specified for your caliper while the pads and wheel are out. Using a block sized for a different caliper pushes the pistons unevenly.
The Right Hand Tools
Use the sizes specified for your bleed screws, lever ports, pad retainers, caliper fasteners and wheel hardware. Rounding off a small bleed screw turns a service job into a parts order.
Cleaning and Protective Supplies
Nitrile gloves, eye protection, clean lint-free cloths, and only cleaning products approved for your components. DOT fluid is hard on skin and paint.
Use only the torque values and hardware instructions issued for the exact brake and motorcycle interface. If the documents conflict or omit a value, stop and confirm it.
Have the approved figures before loosening wheel, caliper, lever, or hose hardware. A generic bicycle or motorcycle value may not match the fitted joint.
Inspect the Brake System Before Bleeding
Five minutes here saves a wasted bleed and catches the faults that bleeding cannot fix.
Check the Lever and Master Cylinder
Look for damp patches, damaged housings, loose fittings, abnormal lever movement, or visible fluid. A lever body that weeps under pressure needs replacing, not bleeding.
Follow the Entire Brake Hose

Run your eyes and fingers along the full length. Cuts, abrasion, crushed sections, kinks, sharp bends, and fluid residue around fittings all matter.
Pay attention where the hose passes the steering head and any suspension movement zone, because those are the places routing damage collects.
Inspect the Caliper

Check the body, the hose connection, the pistons, the area around the bleed port, and the mounting hardware. Look for weeping, staining and physical damage.
Inspect Pads and Rotors Separately
Judge the friction side on its own terms. Worn, glazed, or contaminated pads and a scored or thin rotor produce poor braking that no bleed improves.
Any fluid leak, cracked component, damaged hose, or lever that sinks under steady pressure requires repair before bleeding. Removing air will not seal a leak.
A system losing fluid needs approved repair before it can be bled and returned to service. Bleeding a leaking brake only hides the fault until it matters.
Prepare the Electric Dirt Bike for Brake Service

Setup is where most home bleeds are won or lost.
Power the Bike Down According to the Manual
Turn the machine off, remove the key, and isolate power the way your manual describes before working near the wheel, rotor, and drivetrain.
One habit worth building on an electric machine: silence is not proof the drive is disabled. There is no idling engine to warn you, so treat the bike as live until power is properly isolated.
Secure the Motorcycle
Use a stand rated for the weight. These machines run well over a hundred pounds before you add anything, and a bike that shifts mid-bleed is a genuine hazard.
Protect or Remove the Friction Components
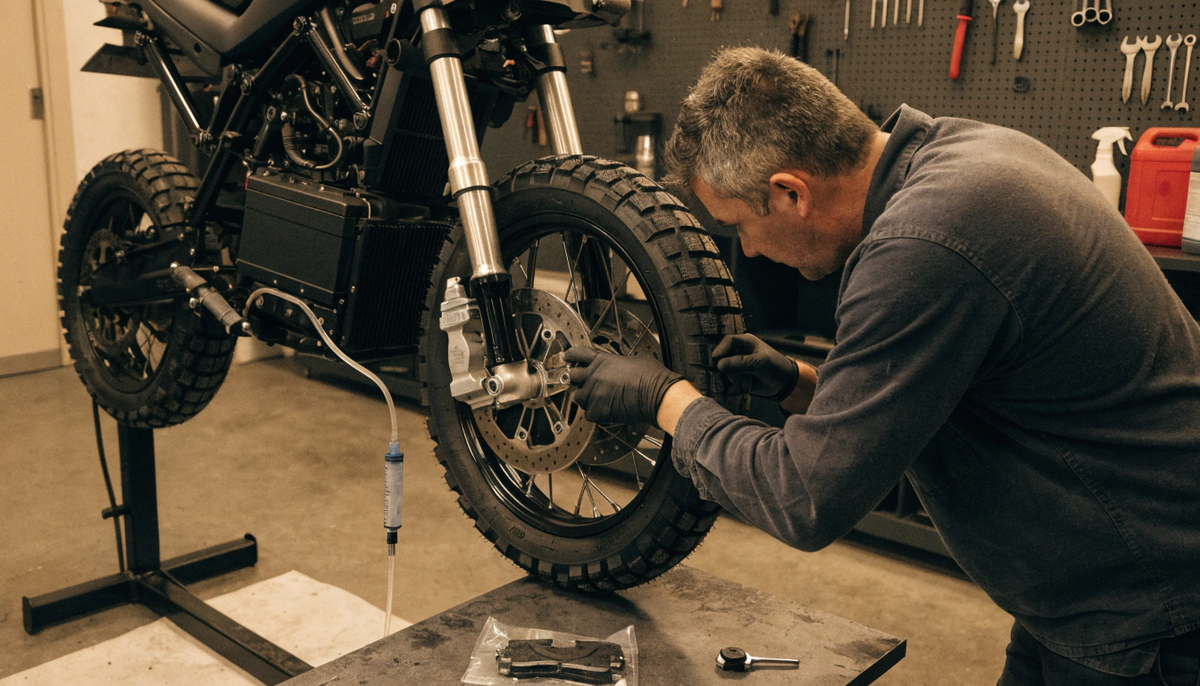
Follow your brake maker's order for wheel removal, pad removal, piston retraction, and bleed block installation. If the procedure says pads out, take them out and store them well away from the work.
Set the Lever and Caliper to the Specified Service Position
Air moves according to the geometry of the hose and the internal cavities, so position is part of the procedure rather than a preference.
Resist the generic advice to level the lever and drop the caliper low. Some systems specify particular lever angles, and Shimano documents different angles for different lever styles. Use yours, not a rule of thumb.
Keep the Work Area Clean
Separate brake tools from chain lube, suspension oil, and grease. Contamination is the most common way a technically successful bleed still ends in weak brakes.
Follow the Exact Brake Manufacturer Procedure

The steps below describe control points, not a universal fluid path. Keep the manufacturer's manual open and follow its sequence, tool orientation, and cautions exactly.
Read your brake maker's procedure end to end before you start. Not step by step as you go.
Prepare the Bleed Tool Without Introducing Air
Fill syringes or funnels as the kit instructs, hold them upright, and expel visible bubbles before connecting anything. SRAM's manuals build this in as a discrete step for a reason.
Air you inject at the start is air you will spend twenty minutes chasing.
Open the Correct Bleed Ports
Use the specified tool, the specified order, and the specified opening method. Universal advice about turning a port a quarter turn does not survive contact with different brake designs.
Move fluid only in the direction and volume specified for the brake. Do not force a syringe against resistance; that can damage seals or disconnect a hose.
Depending on the system, this may be caliper to lever, lever to caliper, a push-and-pull cycle, a funnel bleed, or a gravity-assisted method.
Keep pressure gentle and steady throughout. Forcing fluid can push air past imperfect fittings and back into the circuit.
Use only the maker-approved technique for releasing trapped air. Aggressive tapping, excessive lever travel, or improvised vacuum can introduce new problems.
If your procedure calls for tapping the hose, gently cycling the lever, or repositioning the caliper, follow that sequence. If it does not, do not invent it.
Avoid hard lever pulls while the pistons are retracted. That is how internal seals get damaged during an otherwise careful bleed.
Close the System in the Correct Order
Follow the specified order for closing ports, setting fluid level, removing the bleed tools, refitting screws, and torquing them. Clean spills immediately with an approved product.
Front and Rear Brakes May Need Different Positioning

Rear systems are the ones that frustrate people, and the reason is geometry rather than skill.
Rear Hose Routing Can Trap Air
Long runs, frame routing, bends and high points all give bubbles somewhere to sit. A rear brake often needs more patience than the front for exactly this reason.
Do not rotate, invert, or hang a caliper based on a generic video. Use the model's documented service position so air moves toward the correct port without stressing the hose.
Temporary caliper or lever repositioning is acceptable only when the exact brake maker documents it and the hose remains supported.
A Lever That Changes After Repositioning Is Evidence
If firm feel disappears the moment the lever returns to riding angle, treat that as an unfinished bleed rather than a quirk. Reassess before riding.
Reassemble the Brake Without Contaminating It
Reassembly is part of the brake job, not tidying up afterward.
Clean External Fluid Completely
Remove residue from the lever, hose, caliper, and surrounding paint using a product approved for those components. DOT fluid damages paint and printing if it sits.
Inspect Pads Before Reinstallation

Pads exposed to hydraulic fluid or lubricant should be replaced when the brake maker specifies replacement for contamination. Do not rely on improvised sanding or heat treatment for a safety-critical friction surface.
Inspect the rotor against the brake maker's thickness, crack, scoring, contamination, and runout limits. A numeric limit from another brake model is not transferable.
The rotor must be clean, straight, undamaged, and inside its wear limit. Shimano specifies replacement once a rotor wears to its stated minimum thickness or the aluminum carrier shows through.
Reinstall Wheel and Brake Hardware to Specification

Use your model's own figures. The assembly diagrams in the Valtinsu manual do print torque figures for the front axle and the front caliper bolts. Still, they do not state the units, so confirm the units with support before torquing anything. Do not substitute a number from a bicycle guide.
Perform Post-Bleed Safety Checks Before Riding

Treat this as a gate you have to pass, not a formality.
Check Lever Feel With the Bike Stationary
The lever should feel consistent pull after pull, and it should not creep toward the grip while you hold steady pressure. Creep means the system is not sealed.
Inspect for Leaks Under Pressure
Hold the lever firmly and look closely at the bleed ports, hose fittings, lever body, and caliper connections. Shimano's procedure ends with exactly this check for normal operation and leaks.
Spin the Wheel and Check Brake Release
Confirm the rotor runs clear and the wheel is not being dragged by pistons that did not retract or a caliper sitting off center.
After stationary checks pass, conduct the brake maker's low-speed test in a flat, legal, low-consequence area. Build force gradually and verify each brake independently before normal riding.

Test front and rear separately in a safe, open, off-road area before any speed or gradient. The T-CLOCS pre-ride checklist sets a useful standard here: each brake alone should hold the machine from rolling. Owners of the EM-5 with front and rear hydraulic discs should check both circuits individually rather than judging the pair together.
Stop if Lever Feel Changes Again
A brake that softens, loses pressure, or develops a leak after service is not trail ready. Go back to inspection, not to the trail.
Know When Bedding-In Is Actually Needed
Bedding is tied to new or changed friction surfaces, not automatically to every bleed. Keep existing clean pads and rotor in their established pairing unless the brake maker instructs otherwise.
Bleeding Alone Does Not Always Require Bedding
If the same clean, already bedded pads go back against the same undisturbed rotor, the friction pairing has not changed. Follow your brake maker's guidance rather than a blanket rule.
New Pads or Rotors Usually Do Need Bedding
Fresh friction surfaces need a transfer layer before they deliver full power. Use the pad and rotor maker's own bedding instructions, including their speeds and repetitions, not a number from a blog.
If lever feel is firm but stopping remains weak, inspect friction surfaces and bedding. Do not keep bleeding a hydraulic system that already holds pressure.
Firm lever, weak stopping, no bedding needed? Then look at the pads and rotor. More bleeding will not add friction that is not there.
Troubleshoot a Brake That Is Still Spongy After Bleeding
Do not simply repeat the same procedure a third time. Work down this list instead.
Recheck the Procedure Itself
Verify fluid type, service position, lever angle, piston position, tool sealing, and the exact sequence. If the lever remains soft, recheck the documented procedure and sealing before blaming an internal component.
Look for a Small Leak
Damp fittings, fluid residue that keeps returning, air that reappears within days, or a lever that slowly sinks under steady pressure all point at a fault rather than trapped air.
Inspect the Hose
Damage, kinking, an incorrect fitting, or a compromised hose can make a proper bleed impossible. Shimano notes that connector inserts and olives should not be reused, since a reused part can leak or let the hose pull loose.
Consider the Lever and Caliper Internals
If correct bleeding does not restore consistent pressure, a master cylinder seal, caliper seal, or piston may be at fault. SRAM treats caliper service as necessary only when pistons are damaged, or the system has been contaminated with the wrong fluid.
Do Not Keep Riding a Brake That Cannot Hold Pressure
A lever that softens again, a recurring leak, or a brake that cannot stop the wheel in a stationary check ends the DIY stage. Do not ride to test whether it improves.
Avoid These Brake-Bleeding Mistakes
The highest-risk mistakes are mixing fluids, using the wrong kit or block, contaminating pads or rotors, forcing fluid, opening a system with an active leak, and riding before a complete function test.
- Using the wrong fluid. Compatibility is set by the brake model, never by the brand name.
- Using a generic method. A sequence copied from another brake can leave air trapped or damage fittings.
- Sharing bleed kits between fluid types. Residue in a syringe is enough to contaminate a system.
- Leaving pads exposed. One drop turns a successful bleed into weak, noisy brakes and a parts bill.
- Overtightening bleed screws and fittings. These are small fasteners, and they strip easily.
- Assuming a firm lever means the brake is safe. Leaks, friction surfaces, wheel fitment and rotor clearance all still need checking.
When to Leave Brake Bleeding to a Technician
Knowing where to stop is part of doing this properly. Four situations mean hand it over.
You Cannot Identify the Brake or Fluid
If the brake model or approved fluid cannot be confirmed, do not open the system. Ask the brake manufacturer, bike manufacturer, or a qualified technician.
The Brake Has a Leak or a Damaged Hose
Repair comes first. A bleed on a leaking system gives you a firm lever that will not stay firm.
The Lever Still Loses Pressure After a Correct Bleed
That pattern points to a master cylinder, caliper seal, fitting, or hose, and those need approved parts and procedures.
You Lack the Correct Bleed Kit or Torque Data
If the exact brake, fluid, tools, torque data, or leak repair cannot be confirmed, a high-speed off-road machine is not the place to improvise. Use a qualified brake technician.
Final Takeaway
A safe bleed begins with identification, not a syringe. Confirm the exact brake and fluid, protect friction surfaces, follow the maker's sequence, close and clean the system correctly, then pass stationary and low-speed checks.
Confirm the brakes actually need bleeding rather than pads or repair. Identify the exact brake and its approved fluid, in writing, before opening a port. Inspect for leaks. Protect the pads and rotor. Follow the specified sequence and service position. Then validate with stationary and low-speed checks.
The one thing to carry away: there is no universal two-syringe method, and a firm lever on the stand is not the same as a safe brake on the trail.
FAQs
How do I bleed electric dirt bike brakes safely?
First identify the exact brake model and approved fluid, then follow that brake manufacturer's bleed sequence with the specified kit, block, service position, and closing torque. There is no universal procedure that is safe for every hydraulic brake.
- Confirm whether the system uses the specified mineral oil or DOT fluid.
- Remove or protect pads and rotor from fluid.
- Follow the brake maker's sequence exactly.
- Check for leaks and perform a stationary, then low-speed function test.
How do I know whether my brake needs bleeding?
A soft, compressible lever that firms after several pumps, or a feel that changes when the bike is tilted, can indicate air. A firm lever with weak braking usually points to pads, rotor, contamination, or alignment instead.
A lever that slowly sinks under steady pressure can indicate a leak or internal seal problem. Repair the fault before bleeding.
Can I mix mineral oil and DOT brake fluid?
No. The wrong fluid can damage seals and make the brake unsafe.
Use only the exact fluid named by the brake manufacturer; color, brand familiarity, or what another Valtinsu build uses is not enough. If the fluid cannot be identified from documentation, stop and confirm it before opening the system.
Why is the lever still spongy after bleeding?
Air may remain in a high point, the service position may have been wrong, a fitting may leak, or the lever, hose, or caliper may have an internal fault.
• Recheck the exact manufacturer sequence and bleed-port closing order.
• Inspect every fitting and hose section under steady lever pressure.
• Stop riding if pressure fades again; repeated bleeding will not repair a leak.
Do new pads or rotors need bedding after a brake bleed?
A bleed alone does not normally require bedding if the existing clean pads and rotor were reinstalled unchanged. New pads, a new rotor, or replaced contaminated pads usually do require the brake maker's bedding procedure.
Do not use bedding to compensate for a soft lever, leak, or incorrect assembly. Resolve the hydraulic or installation problem first.
How often should electric dirt bike brakes be bled?
Follow the brake manufacturer's interval and service the system sooner if lever feel changes, the hydraulic circuit is opened, or the fluid condition requires a flush. Riding frequency alone is not a reliable universal interval.
Record the brake model, fluid, service date, and symptoms. That prevents the next service from relying on memory or a generic schedule.
Sources
- Park Tool, Shimano Hydraulic Brake Service and Adjustment (2023)
- Shimano, Dealer's Manual: Hydraulic Disc Brake, DM-MDBR001 (Shimano Inc.)
- SRAM, DOT Fluid MTB Disc Brake Hose Shortening and Bleed Manual (SRAM LLC)
- SRAM, Mineral Oil MTB Disc Brake Installation, Hose Shortening and Bleed Manual (SRAM LLC)
- SRAM, G2 RS and G2 R Service Manual (2022)
- SRAM Support, What Type of Brake Fluid Is Used in SRAM Hydraulic DOT Brake Systems? (2026)
- Office of the Federal Register, 49 CFR 571.116, Standard No. 116: Motor Vehicle Brake Fluids (eCFR, current edition)
- Motorcycle Safety Foundation, T-CLOCS Pre-Ride Inspection Checklist (MSF)


Looking for something else?

Electric Dirt Bike Replacement Parts Availability: What Buyers Should Verify Before Ordering
LEARN MORE
How to Check an Electric Dirt Bike for Safety Recalls by Model and Serial Number
LEARN MORE
How to Choose an Electric Dirt Bike Repair Shop: Questions to Ask Before Service
LEARN MORE
How to Lift a Fallen Electric Dirt Bike Without Hurting Yourself or the Bike
LEARN MORELooking for something else?

Electric Dirt Bike Fall Riding on Wet Leaves: Grip, Hidden Obstacles and Braking
LEARN MORE
Electric Dirt Bike Trailside Power Loss: Recovery Plan When the Battery Is Dead
LEARN MORE