Electric Dirt Bike Wheel Bearing Symptoms and Safe Checks
Most riders who suspect a wheel bearing are working from one symptom, and that is rarely enough. A rumble, a hot hub or movement at the rim can each come from four different components. Replace a bearing that was never the problem and you keep the fault and lose the money. This guide covers the step before repair: confirming the bearing is actually the cause.
|
Before you start This guide helps identify possible wheel-bearing problems before repair. It does not replace the service procedure for your exact electric dirt bike. Use the manufacturer manual for model-specific axle, bearing, wheel and torque specifications. |
What a Wheel Bearing Does

A wheel bearing sits inside the hub and lets the wheel rotate around the axle with minimal friction. Each wheel typically has bearings on both sides, with a spacer between their inner races.
That spacer matters for diagnosis. RevZilla notes it supports the inner races when the axle is torqued, creating a load path between the axle ends, wheel spacers and bearings, so a missing or displaced spacer produces symptoms that feel like a bearing fault but are not. RevZilla also points out that a wheel bearing turns nearly a thousand times per mile, which is why a small defect deteriorates quickly rather than staying stable.
What Are the Symptoms of a Bad Electric Dirt Bike Wheel Bearing?

Six symptoms come up repeatedly. Each is a reason to inspect. None is proof on its own.
Wheel hub play
Side-to-side movement when the wheel is off the ground and rocked by hand. This is the check UK government inspection guidance uses: with each wheel raised clear of the ground, rock the wheel by hand to look for excessive play in the wheel bearings.
The DVSA grades it: excessive play is a major defect, and play so excessive that the bearing may break up or directional control is impaired is classed as dangerous. But movement at the rim is not automatically bearing movement. A loose spindle, loose or broken spokes, a distorted rim, worn suspension bushes or a missing spacer all feel similar in your hands.
Rough or gritty wheel rotation
Spin the wheel and it feels notchy, gritty or resistant rather than free. The same government guidance pairs this with the play check: spin the wheel and listen for roughness in the bearings. Excessive roughness is a major defect, and roughness severe enough that the bearing is likely to overheat or break up is dangerous.
Alternatives are common. Brake drag from a misaligned caliper, a bent rotor, a tire fouling another component, or incorrect axle installation will all add resistance with the bearing intact.
Wheel bearing rumble or grinding
A low-frequency rumble that changes with wheel speed, or a grinding noise under rotation. Grinding is more concerning than rumble and deserves immediate inspection.
The problem with noise is that a wheel has many rotating parts. Tire tread, a rubbing rotor, the chain, sprockets, a chain guide or a spoke crossing all generate speed-related sound. Noise tells you something rotates badly. Not which part.
Vibration and unstable handling
Vibration through the bars or pegs, a loose feeling, or difficulty holding a line. Bearing looseness can do this, and so can a tire with a lump or bulge, a bent rim, loose spokes or rotor runout. A useful discriminator: if the vibration appears or changes under braking, look at the brake and rotor first.
Hot wheel hub
Heat is the symptom most often misread, and it gets its own section below.
Uneven wheel or tire behaviour
Wheel wobble, uneven tire wear or abnormal tire movement. Treat these as wheel-system findings rather than bearing findings. Government inspection guidance treats a missing, cracked, excessively loose, bent or corroded spoke as a major defect in its own right, and sets lateral rim distortion limits of 4 mm for steel and 2 mm for aluminium alloy, with 3 mm maximum eccentricity. Those are road-vehicle limits, not a Valtinsu specification, but they show a rim can be measurably out of true with the bearings fine.
Is It Really the Wheel Bearing? Differential Diagnosis

This table is the core of the article. Read the row that matches your symptom, then work the right-hand column before you order a bearing.
|
Symptom |
Possible bearing cause |
Other possible causes |
What to check |
|
Wheel hub play |
Worn bearing or damaged bearing seat |
Loose spindle, loose spokes, distorted rim, worn suspension bush, missing spacer |
Locate exactly where movement originates: hub, spindle, rim or fork |
|
Rough wheel rotation |
Pitted or contaminated bearing |
Brake drag, bent rotor, tire fouling a component, tight or misinstalled axle |
Inspect brake and tire clearance before condemning the bearing |
|
Rumble |
Bearing race or roller damage |
Tire tread, rotor contact, chain, sprocket, chain guide |
Rotate slowly by hand and locate the source |
|
Hot hub |
Bearing friction or failed seal |
Brake drag, over-tight axle, tire contact |
Compare hub against rotor heat cautiously. Do not touch a hot rotor |
|
Vibration |
Bearing looseness or uneven wear |
Tire lump or bulge, bent rim, loose spokes, rotor runout |
Check whether vibration changes under braking |
|
Wheel wobble |
Bearing play |
Loose or broken spokes, distorted rim, axle installation |
Confirm spindle security and wheel seating first |
|
Rear-wheel noise |
Bearing or hub |
Chain, sprockets, chain guide, chain slider, wheel alignment |
Inspect the rear drivetrain before the bearing |
|
Clicking |
Bearing damage or loose bearing fit |
Spoke crossing, brake hardware, axle spacer |
Rotate slowly and locate the sound precisely |
Note what the table does not do. It does not clear the bearing, and it does not condemn it. It tells you what else produces that symptom, so you eliminate the cheap and obvious before touching the hub.
How to Check Wheel Hub Play Safely

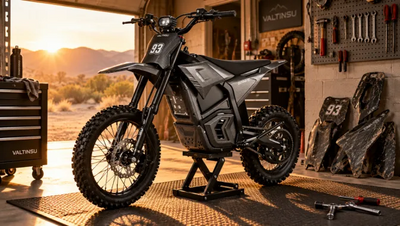
Work with the bike switched off and securely supported. Never do this with the bike powered or resting on a side stand.
- Switch the bike off.
- Remove the battery if that is practical and appropriate for your model.
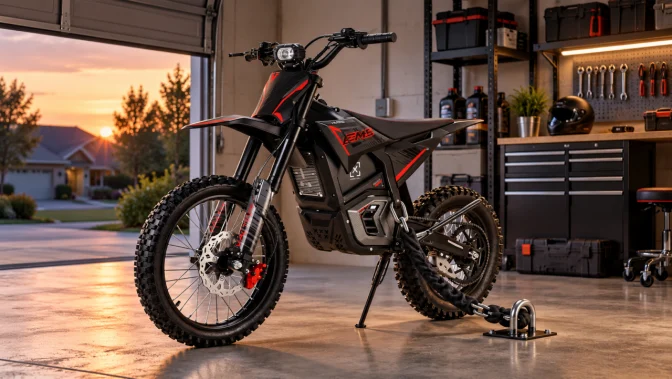
- Support the bike on a stable stand or lift so it cannot shift or tip.
- Raise the wheel you are checking clear of the ground.
- Hold the wheel at roughly the 12 and 6 o’clock positions.
- Rock it gently side to side and feel for movement.
- Repeat at roughly the 3 and 9 o’clock positions.
- Identify exactly where the movement originates.
That last step is the one that matters. RevZilla describes a quick version: hold a fork leg at the front, or the subframe at the rear, with one hand and the top of the tire with the other, then push and pull firmly. Clicking, clunking or visible movement of the hub relative to the axle points toward a bearing.
Movement at the hub is more suspicious for a bearing, spacer or spindle problem. Movement at the rim with loose spoke tension points at the wheel instead. RevZilla is candid about the test’s limits too: it reveals only major problems, and a bearing can be close to failure while still passing it.
How to Check an Electric Motorcycle Wheel Bearing

- Power down the bike and remove the battery if practical.
- Support it securely with the wheel clear of the ground.
- Check for hub play at 12 and 6, then 3 and 9.
- Spin the wheel by hand, keeping hands away from the chain, sprocket and rotor.
- Listen for roughness, rumbling or grinding.
- Feel for gritty resistance, notchiness or binding.
- Rotate through at least one full revolution, watching for tight spots and uneven resistance.
- Inspect the visible bearing area and seals for damage, contamination or grease leakage.
- Check tire, rim, spoke, brake and axle condition before concluding anything.
- On the rear wheel, inspect chain, sprockets, chain guide and alignment as noise sources.
If the wheel has to come off, or bearing removal is indicated, follow your model manual or use qualified service. RevZilla is unambiguous about the standard once a bearing can be turned by finger with the wheel off: any play or roughness whatsoever warrants replacement, with no grey zone.
Front Wheel Versus Rear Wheel Checks

The front wheel has fewer variables, which makes it easier to isolate.
Front: bearing, axle or spindle, spacers, tire, rim, spokes, brake rotor, caliper, and fork or suspension hardware.
Rear: everything above, plus chain, front sprocket, rear sprocket, chain guide, chain slider and rear wheel alignment.
That difference explains a common misdiagnosis. Rear-wheel noise gets blamed on a bearing far more often than it should, because the rear wheel carries a whole drivetrain that also makes noise at wheel speed. Work the chain and sprockets first.
What Does a Hot Wheel Hub Mean?

A hot wheel hub does not automatically mean the wheel bearing has failed. Bearing friction can generate heat, but so can several other things.
- Brake drag from a caliper that is not releasing
- A rotor contacting a pad continuously
- Excessive axle preload or incorrect installation
- A tire fouling another component
- A damaged seal allowing contamination into the bearing
|
Two cautions on heat The brake rotor can become far hotter than the hub after riding. Do not touch a rotor or hub immediately after a ride. Let the components cool before inspecting. This article gives no temperature figure, because no manufacturer source supports one for these machines. Heat is useful as a comparative and combinational signal, not as a number. |
The combination is what raises suspicion. A warm hub on its own after a hard ride tells you little. A hot hub with rough rotation or hub play is a much stronger signal, and a reason to stop riding rather than monitor.
Wheel Noise: What It Can Mean
|
Noise |
First things to check |
|
Low rumble |
Bearing, tire tread, rotor contact, other rotating components |
|
Grinding |
Bearing, brake pads and rotor. Inspect immediately |
|
Clicking |
Bearing, spokes, axle spacer, brake hardware |
|
Rear rattling |
Chain, sprockets, chain guide, chain slider |
|
Noise only under braking |
Brake pads, rotor, caliper alignment |
|
Vibration with noise |
Tire condition, rim trueness, spoke tension, rotor runout |
Do not diagnose from sound alone. Sound narrows the list; the hands-on checks confirm it.
When Should You Stop Riding?

|
Stop riding and arrange inspection if you find
Government inspection guidance treats the severe end of these as dangerous rather than merely defective: bearing play so excessive that the bearing is likely to break up or directional control is impaired, roughness severe enough that the bearing may overheat or break up, and a spindle or its securing nuts so insecure that wheel security or steering control is adversely affected. Temporary noise after a wet or muddy ride is a different matter. That warrants inspection, not necessarily an ended ride. |
How Is Wheel Bearing Wear Confirmed?
Bearing condition is assessed through wheel play, rough or gritty rotation, abnormal noise, binding, overheating, seal or physical damage, and where necessary further inspection after wheel removal. Replacement becomes the stronger answer once inspection confirms significant wear or damage: excessive play, roughness, binding, visible damage, noise tied to bearing condition, overheating from bearing friction, or failed seals with contamination.
|
What this article will not give you No bearing dimensions, part numbers or manufacturer. No axle or bearing torque figure. No replacement mileage or service life. No universal temperature or play threshold. Use the bearing specification and service procedure for the exact model and wheel position. Valtinsu does not publish bearing specifications in its available product information, so those figures come from the model manual or from Valtinsu support. |
On inspection frequency, one published reference is worth citing carefully. RevZilla notes most street-bike manuals recommend inspecting wheel bearings around every 7,500 miles, and that riders who regularly ride in rain or off road should check more often, because water and dirt exposure can drastically shorten bearing life, especially with worn seals. That is a street-bike inspection reference, not a replacement interval and not a Valtinsu figure. For an off-road machine, the second half is the operative part.
Valtinsu Model Context
Wheel diagnosis on a fast adult machine should consider the whole wheel and drivetrain system rather than the bearing alone. The Valtinsu EM-5 Pro electric dirt bike is currently listed with a 5,600 W geared motor, 177 lb-ft of torque, a 52 mph top speed, a 287 lb maximum load, 17-inch front and 14-inch rear wheels, hydraulic disc brakes, chain drive, front hydraulic shocks and rear air suspension, for riders 18 and over.
Those figures are context, not a bearing claim. None causes bearing failure and none implies a service interval. What they explain is why differential diagnosis is worth the time: a machine with hydraulic disc brakes, a chain drivetrain, spoked wheels and real suspension has several components that each produce noise, drag, vibration or heat around the wheel.
If you are comparing machines by wheel size, suspension and brake setup, the current range of adult electric dirt bikes shows how those differ between models. Wheel and brake hardware is not shared across the lineup, so a check that applies to one may not transfer to another.
Check the Manual Before Removing a Wheel
Before removing a wheel or adjusting axle hardware, consult the Valtinsu electric dirt bike user manual for your exact model. Valtinsu currently provides model-specific manuals for the EM-5, EM-5 Pro in green and black, EM-5 Ultra and EM23.
Valtinsu’s own guidance is to avoid forcing components that do not align, and to seek qualified technician assistance for unfamiliar work. Wheel and axle work qualifies if you have not done it before.
How to Prevent Premature Wheel Bearing Problems
- Inspect the wheels regularly rather than only when something sounds wrong.
- Make sure wheel and axle installation is correct, following the model procedure.
- Inspect after hard impacts, deep water and heavy mud.
- Address brake drag rather than living with it.
- Check tire condition, rim trueness and spoke security.
- Keep rear wheel and sprocket alignment correct.
- Deal with wheel play early, while it is still cheap.
- Follow the model-specific maintenance guidance in your manual.
Quick Wheel Bearing Inspection Checklist
- Bike powered off
- Battery removed if practical
- Bike securely supported
- No abnormal wheel play
- Wheel rotates smoothly
- No grinding
- No abnormal rumbling
- No binding or tight spots
- Tire free of visible damage
- Rim appears sound and true
- Spokes secure
- Brake not dragging
- Axle or spindle correctly installed and secure
- Rear chain and sprockets checked
- No abnormal hub heat
When to Get Professional Help
Get qualified service if you are not comfortable removing a wheel, if the bearing needs removal, if you cannot locate where movement originates, if you find visible bearing or hub damage, or if the wheel shows severe play, grinding, binding or instability. Wheel security is not something to experiment with.
Before Your Next Ride
If your wheel feels loose, rumbles, or rotates roughly, do not diagnose it from noise alone. Start with the wheel, brake, tire and axle checks above, then consult the Valtinsu electric dirt bike user manual for model-specific procedures. If you find severe play, grinding, overheating or instability, stop riding and arrange qualified inspection.
For model specifications and current wheel and brake hardware across the range, see Valtinsu electric dirt bikes.
Frequently Asked Questions
What are the symptoms of a bad electric dirt bike wheel bearing?
Wheel hub play, rough or gritty rotation, a rumble that changes with wheel speed, vibration, unstable handling and unusual hub heat. Each is a reason to inspect rather than proof of failure. Check the brake, tire, spokes, rim, axle and rear drivetrain before concluding the bearing is at fault.
How do I check wheel hub play?
With the bike off and securely supported, raise the wheel clear of the ground. Hold it at 12 and 6 o’clock and rock it gently side to side, then repeat at 3 and 9. Identify exactly where the movement originates, because a loose spindle, loose spokes or worn suspension bushes feel similar.
Why does my electric dirt bike wheel rumble?
A rumble that changes with wheel speed points to a rotating component, but not necessarily the bearing. Tire tread, a rubbing rotor, the chain, sprockets or a chain guide can all produce it. Rotate the wheel slowly by hand with the bike supported and locate the source before replacing anything.
Is a hot wheel hub always a bad bearing?
No. A hot hub can result from bearing friction, but brake drag, incorrect axle installation, tire contact or a damaged seal can also generate heat. If unusual heat occurs together with rough rotation or wheel play, stop riding and have the wheel inspected rather than assuming the bearing is the only problem.
Can loose spokes feel like a bad wheel bearing?
Yes. Loose spokes can produce lateral wheel movement, wobble and clicking that resemble bearing play. The distinction is where the movement originates: at the hub, or at the rim. UK inspection guidance treats a missing, cracked, excessively loose, bent or corroded spoke as a defect in its own right.
Can a loose axle cause wheel hub play?
Yes, and it is one of the most common false positives. A loose wheel spindle produces movement that feels like bearing play, and government inspection guidance classes an insecure spindle as a wheel-security defect. Confirm the axle is correctly installed and secure before inspecting the bearing.
Can I ride with a noisy wheel bearing?
Riding with a noisy, loose, rough or overheating wheel bearing is not recommended. A deteriorating bearing can damage the hub, affect wheel alignment and increase drag. If there is noticeable play, grinding, severe heat or instability, stop riding and arrange inspection or repair.
How can I tell if the problem is the bearing or the brake?
Check whether the symptom changes when the brake is involved. Drag or heat that eases when the caliper is inspected or realigned points at the brake. Vibration that appears mainly under braking points at the rotor. Roughness and play that persist with the brake ruled out point back toward the bearing.
Sources
- Driver and Vehicle Standards Agency (GOV.UK), MOT Inspection Manual for Motorcycles, Section 5: Wheels, Tyres and Suspension. Published 20 May 2018, updated 1 April 2026. Retrieved 11 Aug 2026. Used for: the wheel-bearing assessment method of rocking each raised wheel by hand for excessive play and spinning it to listen for roughness; the defect categories of major for excessive play or excessive roughness and dangerous where play may cause break-up or impaired directional control, or where roughness may cause overheating or break-up; wheel security including a loose spindle and a worn or damaged hub; spoke defects; and rim distortion limits of 4 mm for steel and 2 mm for aluminium alloy with 3 mm maximum eccentricity. Presented as government motorcycle inspection guidance, not as a Valtinsu requirement.
- RevZilla Common Tread, Ari Henning, How to check and replace your motorcycle wheel bearings. Published 11 November 2025. Retrieved 11 Aug 2026. Used for: the quick push-pull play test holding a fork leg or subframe and the top of the tire; clicking, clunking or hub movement relative to the axle as bearing indicators; the limitation that the push-pull test reveals only major problems and a failing bearing can pass it; the standard that any play or roughness whatsoever warrants replacement once the bearing can be turned by finger; the inner spacer supporting the races and creating the axle load path; a wheel bearing rotating nearly 1,000 times per mile; and inspection around 7,500 miles per most street-bike manuals with more frequent checks for wet or off-road use. Treated as reputable motorcycle maintenance guidance, not as Valtinsu documentation.
- Park Tool, Hub Overhaul and Adjustment. Retrieved 11 Aug 2026. Used for background only, on the concepts of hub play and bearing adjustment. Park Tool is bicycle-focused and no bicycle measurement or standard from it is applied to an electric dirt bike in this article.
- Valtinsu, User Manuals. Retrieved 11 Aug 2026. Used for: the model-specific manuals available for EM-5, EM-5 Pro Green, EM-5 Pro Black, EM-5 Ultra and EM23, and their role as the first-party destination for wheel, axle and bearing procedures.
- Valtinsu, EM-5 Pro Black Electric Dirt Bike. Retrieved 11 Aug 2026. Used for: 5,600 W geared motor, 177 lb-ft torque, 52 mph top speed, 60V 27Ah battery, up to 59 mile claimed range, 287 lb maximum load, 31.5 inch seat height, 17 and 14 inch wheels, IPX6, chain drive, front hydraulic shocks and rear air suspension, age grade 18+. Used as model context only. No bearing specification is inferred from these figures.
- Valtinsu, Electric Dirt Bike Collection. Retrieved 11 Aug 2026. Used for: current lineup context, differing wheel and brake hardware across models, and the statement that the range is for off-road use only.
- Valtinsu, Parts and Accessories. Retrieved 11 Aug 2026. Used for: the guidance not to force components that do not align and to seek qualified technician assistance for unfamiliar work.


Looking for something else?

Electric Dirt Bike Replacement Parts Availability: What Buyers Should Verify Before Ordering
LEARN MORE
How to Check an Electric Dirt Bike for Safety Recalls by Model and Serial Number
LEARN MORE
How to Choose an Electric Dirt Bike Repair Shop: Questions to Ask Before Service
LEARN MORE
How to Lift a Fallen Electric Dirt Bike Without Hurting Yourself or the Bike
LEARN MORELooking for something else?

Electric Dirt Bike Fall Riding on Wet Leaves: Grip, Hidden Obstacles and Braking
LEARN MORE
Electric Dirt Bike Trailside Power Loss: Recovery Plan When the Battery Is Dead
LEARN MORE