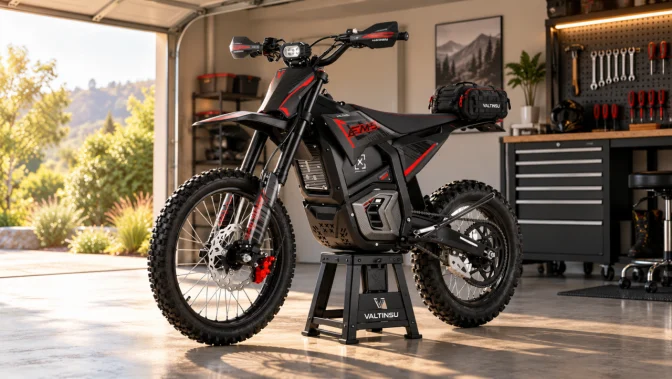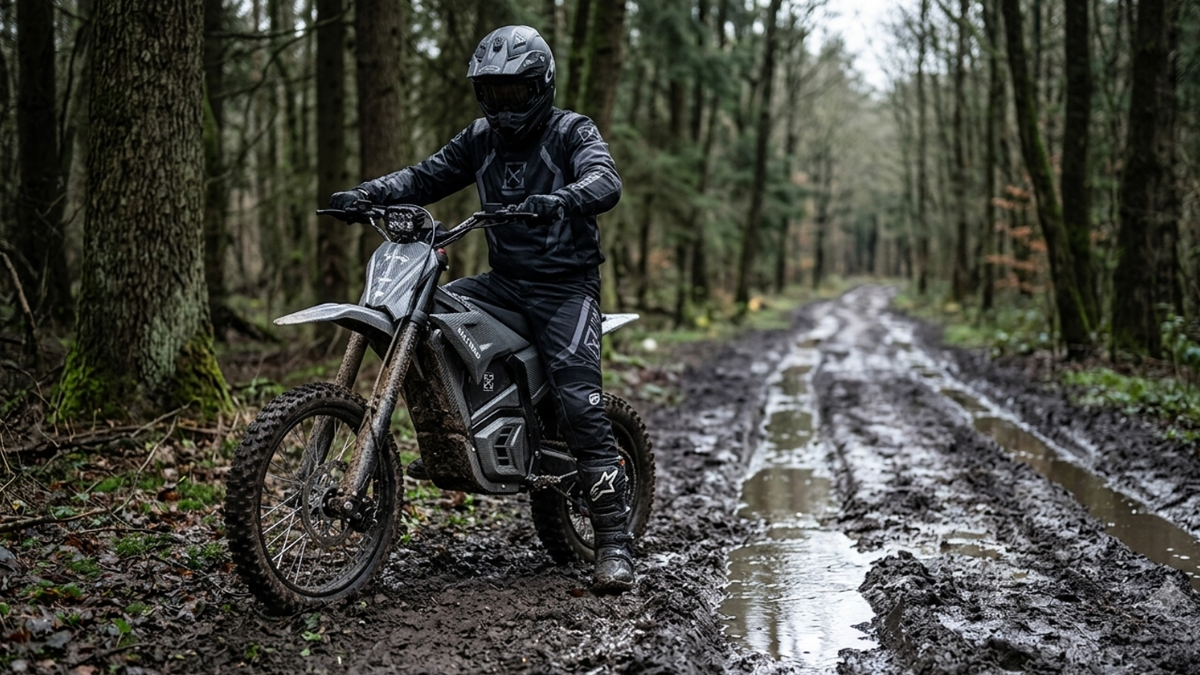
Electric Dirt Bike Mud Riding: Setup, Technique and Cleanup
Before riding an electric dirt bike in mud, confirm that the route is open, then assess soil saturation, visible water, tire condition, rider skill, battery reserve and recovery options. Legal access and physical rideability are separate checks.
Shallow mud over a firm base may be passable when the route is open and the rider can stop without deepening ruts. Saturated ground is a turn-back condition. On an electric dirt bike, use smooth throttle input and follow the exact model's water-exposure limits; an enclosure rating is not a water-depth rating.
Use this order: route status, soil condition, visible water depth and bottom, rider skill, battery reserve and recovery capacity. If any check fails, wait for better conditions or choose another route.
This guide includes a ride-or-turn-back matrix, four common mud types, setup baselines, traction technique, water-resistance limits, recovery planning and post-ride cleaning and inspection.
Decide Whether to Ride the Muddy Trail
Base the decision on current official status and observable trail conditions before unloading the bike.

Check Whether the Route Is Open
Motorized access in dry weather does not carry over to wet weather. Plenty of systems close on rain alone. Georgia's Houston Valley OHV trails are managed as a dry-riding system and shut after significant rain, sometimes for several days, and the Forest Service asks riders to call the district office before towing anything anywhere.
Some forests have moved past fixed calendar closures entirely. The Tahoe National Forest runs a soil-moisture-based open and close strategy on the Foresthill system, with a recorded status line riders are told to check often through the wet months (Tahoe National Forest). Read that as a warning: last weekend's status is not this weekend's status.
And "the mud looks fun" is not a defense. On the Willamette National Forest, mudding is flatly illegal, and vehicles are required to stay on designated routes (Willamette National Forest).
Read the Trail for Saturation
Walk the first thirty yards before you ride them. Look for water standing across the route, deepening wheel tracks, edges that crumble when you step on them, runoff moving downhill, and mud that loads onto a boot in one stride.
Any of those means the ground is not carrying weight. The Uinta-Wasatch-Cache National Forest puts the consequence plainly: knobby tires pull soil and road base away from the trail prism, and damage done to wet trails sometimes cannot be repaired at all.
If the surface cannot support the bike without deepening ruts or displacing the trail base, turn back.
Match the Route to the Rider and the Motorcycle
Mud experience, tire condition, machine weight, remaining charge, route distance, and who is available to help all set your real ceiling. A two-mile loop within sight of the truck tolerates a mistake. A remote section with no turnaround does not.
The dangerous section is not always the one that looks dramatic. A shallow-looking patch can hide soft ground and leave a rider far from the trailhead with a bike they cannot recover. Plan lifting, pushing and turnaround before entry.
Use a Ride, Wait or Turn Back Matrix
Decide from what the trail is showing you, then re-run the same check whenever the surface, the battery or your own arms change.
|
Trail evidence |
What it actually means |
The call |
|
Open route, firm base, thin surface mud |
Grip is reduced, but the ground still carries the bike |
Ride, with smooth inputs |
|
Ruts deepening under your own wheel |
You are now the cause of the damage |
Turn back |
|
Repeated steering loss on a line you chose carefully |
The surface is past what technique can recover |
Turn back |
|
Standing water, bottom not visible |
Unknown depth, unknown debris, electrical exposure |
Do not enter |
|
Posted or recorded wet-weather closure |
Illegal access, plus surface damage |
Wait for the reopen |
|
Charge or physical reserve dropping faster than planned |
Recovery margin is closing |
Return early |
|
Tread packed solid and staying packed |
The tire has stopped working as a tire |
Stop and clear it, then reassess |
Know Which Mud You Are Actually Looking At
Four surfaces get called mud. They behave nothing alike, and the wrong response to each one is different.

|
Mud type |
How it behaves |
Line and input |
Default call |
|
Thin film on firm base |
Tires do not sink, the bike still slides |
Avoid polished tracks, hunt textured ground |
Ride |
|
Sticky clay |
Packs the knobs solid, adds weight and rolling drag |
Short sections only, clear the tread often |
Ride with a hard limit |
|
Deep ruts and bog |
Traps a wheel, catches a peg, hides rock |
Assess the exit before the entry |
Usually turn back |
|
Mud under standing water |
Depth, bottom and debris all unknown |
No line is a safe line |
Do not enter |
Thin Surface Mud Over a Firm Base
Thin surface mud over a firm base can still reduce grip sharply. Use smooth steering, braking and throttle, and choose textured ground only when it remains inside the designated trail corridor.
Sticky Clay That Packs the Tread
Clay fills the gaps between knobs until the tire is effectively slick. Then it keeps loading. The extra weight and rolling resistance eat charge, and braking and steering both start reporting late.
Stop and clear it. If it packs again within a minute of moving, the section is over your tire, and no pressure change alters that.
Deep Ruts and Soft Boggy Ground
A rut can trap a front wheel, catch a footpeg or hide a rock. Soft boggy ground can also make a disabled bike difficult to move. Assess the exit and recovery route before entry.
Weight is the part people underestimate. The EM-5 sits at 126 lb net and the EM-5 Pro at 143 lb, and both are genuinely hard to lift out of a hole at an awkward angle when your boots have no purchase either. Look at the exit first. Every time.
Mud Hidden Under Standing Water
You cannot read a water-covered section from the saddle. Depth, bottom firmness, current, holes, rock and submerged debris are all invisible, and a wrong guess here is the expensive kind.
Take the approved alternative, or turn around. There is no third option worth writing down.
Confirm the Motorcycle Suits the Conditions
A general off-road label is not a mud approval. Check the specific machine.
Read the Water-Exposure Instructions
Rain, spray, washing, immersion, charging, and battery handling each have their own limits, and those limits live in the documentation for your exact machine. The Valtinsu user manuals cover the required inspection and drying steps after exposure. Follow the procedure that is written down, including the waiting periods, which are the part everyone skips.
Inspect Tires, Brakes and Controls
Tread depth, cuts, documented pressure, wheel condition. Then squeeze both levers and let the throttle snap shut on its own. Then levers, foot controls, guards and any hardware you can reach, checked for looseness, damage or restricted travel.
Two minutes. Worth more than any of the setup that follows.
Inspect the External Electrical Parts
Battery retainers, cable routes, connector covers, housings, seals. Cracked plastic, pinched insulation, or a cover that no longer seats is a reason to cancel, not a reason to ride carefully.
Do not open sealed components or probe wiring without an approved service procedure. That is a shop job.
Set Up From Documented Baselines
Mud setup is not a magic number someone posts in a comment. It is your documented baseline, adjusted one variable at a time.
Pick Tires That Release Mud

Knob spacing and the tire's ability to shed soil matter more than raw width. Wider is not automatically better, and deeper is not either, because construction and terrain compatibility drive how the tire steers once it is loaded. Our knobby versus street tire guide breaks the selection down by terrain. Whatever you choose has to be approved for that motorcycle and those wheels.
Set Tire Pressure for the Exact Tire and Load
There is no universal mud pressure. Tire construction, rim design, tube or tubeless setup, riding load, speed and terrain all affect the safe pressure range.
Start from the tire and motorcycle manufacturer figures. Then move in small steps. Dropping pressure hard to chase grip raises pinch-flat, bead, rim and handling risk at the same time, and a flat four miles in is its own emergency.
Start From Approved Suspension Settings
Sag, spring support, damping and service condition all get checked against the manual first. If adjustment is permitted on your model, change one setting, write down where it started, and test somewhere controlled before the mud gets serious.
The adjustable rear air shock on the EM-5 and EM-5 Pro makes this easier than a fixed coil, since sag can be tuned for rider weight without swapping parts. Easier is not the same as guess freely.
Choose a Power Mode That Suits the Surface
Choose the manufacturer-approved mode with the most predictable response for the rider and conditions. A lower speed cap does not prove a softer throttle map, and mode behavior varies by model. Learn the response in a controlled, authorized practice area before entering mud.
Regenerative drag deserves the same thought. Strong regen can unsettle a rear wheel the instant you close the throttle, which is precisely the wrong moment. Because these controls differ by model, use your own instructions rather than generic advice.
Protect the Return Range
Wheelspin, packed tires, slow technical riding, climbs and repeated recovery attempts all pull charge harder than a dry ride at the same distance. Cold weather and extra load narrow the margin further.
So do not plan around a published range figure. Start full, watch consumption against distance covered, and turn around on the number you set before you left, not the number that feels survivable at the time.
Control Traction While Riding in Mud
Mud traction depends on surface, tire condition, pressure, speed, lean angle and rider input. Make throttle, steering and braking changes progressively so the tires are not asked to do everything at once.
Look Further Ahead Than Feels Necessary
Scan fifteen to twenty feet out for firm edges, deepening ruts, standing water, roots and loose rock. The point is not obstacle avoidance. It is having somewhere to go, and enough warning to spot other users or a place to stop, before the line commits itself.
Pick the Firmest Legal Line
Established and supportive, and inside the trail. Never widen the route, cut a bypass, ride through vegetation, or go around a closure barrier to dodge a wet section. That is how the Forest Service ends up describing damage that cannot be repaired, and it is how systems get closed for everybody (Uinta-Wasatch-Cache National Forest).
Roll the Throttle, Never Snap It
Instant torque breaks grip on a slick surface faster than a rider can react. Roll on deliberately and let momentum do the work. Snapping it open just converts charge into a hole.
Stand When Standing Helps
On the pegs, knees and elbows soft, letting the bike move under you. Shift weight to support acceleration, braking, climbs and descents rather than fighting each one from a locked seated position.
Brake Before the Slippery Part, Not During
Finish braking while upright and on firm ground. Grabbing front brake mid-lean on glazed mud, or dumping regen suddenly, is the classic way a controlled situation becomes a crash.
Carry Momentum, Not Speed
Use only enough speed to maintain control and remain able to stop within the visible clear path. Mud makes stopping distance less predictable, so reduce speed before visibility or surface grip worsens.
Let a Slide Settle Itself
If the bike begins to slide, look toward the safe exit and reduce abrupt inputs. Do not assume a slide will recover on its own; available grip, speed, lean angle and obstacles determine the outcome. Practice recovery skills only with qualified instruction in a controlled area.
|
Expert view Set turnaround conditions before leaving the trailhead: route closure, unknown water, repeated wheelspin, deepening ruts, loss of steering feedback, battery reserve, fatigue or an uncertain recovery. Share those limits with the group and turn back when one becomes decisive. |
Water Resistance Is Not Waterproofing
Electric dirt bike water resistance protects electronics against defined exposure. It does not authorize a crossing.

Rain, Spray, Washing and Immersion Are Four Different Things
Light rain, trail spray, a careful wash, and a full dunk sit at four different risk levels, and manufacturer documentation treats them separately for good reason. The one your bike tolerates says nothing about the next one up.
An IP Rating Is a Lab Result, Not a Depth Limit
Under IEC 60529, the second digit of an IP code is the water figure, tested in a controlled sequence from IPX1 dripping through IPX8 continuous immersion (TUV SUD). IPX6, the rating on the Valtinsu off-road models, is a powerful water jet test. Not an immersion test.
A controlled water-jet test does not reproduce a trail crossing. Depth, entry speed, exposure time, pressure, seal age, temperature and prior damage all change real-world risk, so an IP rating should not be converted into a safe crossing depth.
An IP rating describes the tested sample and conditions, not the current health of every seal. Impact, age, incorrect assembly or damaged covers can reduce protection.
Treat Unknown Water as a No-Go
Depth confirmed, current confirmed, bottom confirmed, and the route approved for it. Anything less, turn around. Water is the one place on this list where a mistake takes the battery with it.
Never Charge a Wet Bike
Keep the charge port, plug, battery housing and workspace dry. CPSC advises following manufacturer charging instructions, using the supplied or approved charger and stopping use of damaged equipment. After a wet ride, follow the model manual's inspection and drying procedure before charging.
Know When to Stop, Turn Back or Recover
Set the recovery margin early, because exhaustion, trail damage, a flat pack and a buried bike all arrive together.
Recognize the Turnaround Signals
- Persistent wheelspin where you used to have drive.
- Steering that no longer reports what the front wheel is doing.
- Ruts getting deeper under your own tires.
- Tread packed and staying packed after you clear it.
- Brake feel fading, or levers pulling further than normal.
- Any dashboard warning, code or unexpected power cut.
- Battery reserve below your return number.
- Your own arms and legs, honestly assessed.
One of those is a caution. Two together is a turnaround.
Stop Digging the Rear Wheel In
When forward motion stops, so does the throttle. Immediately. Repeated full-throttle spins trench the wheel, bury the chassis and burn the exact charge you need to get home. Get off, clear the tread, walk it back if you have to.
Plan Recovery Before You Enter Remote Mud
Ride with someone. Carry a strap rated for the job, keep a working communication device, and leave your route with a person who is not on the trail. Then be realistic about the weight, because a 143 lb machine in a rut needs more than one pair of hands and better footing than mud provides.
A Suspected Electrical Fault Ends the Ride
Exposed or damaged wiring, a component running unusually hot, smoke, an error code, a power cutout, or throttle behavior you cannot predict. Stop. Do not ride it back to prove a point, and do not charge it.
Post-Mud Inspection and Cleanup
This is the part that decides whether the ride cost you an afternoon or a component. Dried mud hides cracks, and it hides them until the next ride.
|
Area |
What to look for |
Stop riding if you find |
|
Tires and wheels |
Packed tread, cuts, sidewall damage, rim dents |
Cord showing, a bent rim, a bead not seated |
|
Brakes |
Grit on rotors, pad thickness, lever feel |
Levers that stay soft after the mud is gone |
|
Chain and sprockets |
Packed debris, tension, hooked or missing teeth |
A chain that skips under load |
|
Suspension |
Fork oil, dirt rings, seal damage, grit at the seals |
Oil weeping from a fork leg or shock |
|
Electrical exterior |
Connector covers, insulation, retainers, charge port |
Pinched insulation, a cover that will not seat |
|
Battery area |
Case dry and undamaged, pack locked in, mounting clean |
Swelling, cracks, corrosion, any unusual smell |
Let It Cool, Then Follow the Manual
Stable ground, power off, hot components left alone until they are not hot. Then follow the documented sequence for shutdown, battery handling, port protection, and cleaning. Do not pull the battery unless the manual tells you to.
Remove Heavy Mud Gently
Approved tools, approved products, only the water flow the model permits. No pressure washer, no soaking, no steam, because high pressure drives water past seals that spray never reaches. Keep the stream away from bearings, seals, connectors, the motor, the battery enclosure and the charge port. Our full maintenance routine covers the safe order in more detail.
Clean Brakes, Tires and Drivetrain Properly
Clear tread, wheels, guards and the chain area while the mud is still soft. Inspect sprockets and rotors for damage or contamination. Keep anything not approved for brakes away from braking surfaces, which rules out most general-purpose sprays.
Inspect Suspension and Electrical Parts
Fork and shock areas, visible seals, motor housing, battery enclosure, cables, connector covers, retainers, charge port. Trapped grit is the one people miss, and it is the one that destroys a seal over the following month.
Dry, Lubricate and Store as Directed
Dry by the approved method. Specified lubricants only, at documented points. Then honor the manual on drying time, corrosion prevention, battery storage, and when charging may resume. Replacement chargers, brakes and other parts and accessories are available if the inspection turns something up.
Document Anything Abnormal
One wide photo of the area, close-ups of the damage. Write down the exposure conditions, any warning message, control problems, noise, heat, and roughly when each symptom appeared. Support can act on that. It cannot act on "it feels weird now".
Protect Trail Access on Wet Ground
Access is the resource that runs out first.
No New Ruts, No Bypass Lines
When the surface starts collapsing, or your tires are cutting rather than rolling, turn back. Do not widen the trail, ride around puddles, cut vegetation, or power through saturated ground on repeated attempts. Every one of those is how a temporary closure becomes a permanent one.
Yield, and Control Your Roost
Slow down near hikers, equestrians, other riders, crossings, and blind corners. Horses spook at anything moving quickly and quietly, which describes an electric dirt bike precisely, and the Forest Service asks riders to yield right of way for that reason (Nebraska National Forests and Grasslands). Smooth power also keeps mud and stone out of other people's faces.
Quiet Does Not Mean Permitted
A near-silent approach means nobody hears you coming, so assume they have not. It also grants no access. A quiet motor does not open a closed route or a non-motorized trail, and riding as if it does is how the category loses ground it will not get back.
How We Built This Guide
Worth knowing what this is based on, and what it deliberately refuses to tell you.
Official Route Status Over General Advice
Closure rules, wet-weather management, and etiquette come from Forest Service land managers rather than rider forums, because they are the ones who decide whether the trail reopens. Regional practice varies, which is why this guide points you at your own district instead of a national rule.
Documented Baselines Over Recommended Numbers
Mud tire pressure, safe water exposure, ride mode and usable range are model- and condition-specific. Use the current manual and component limits instead of a universal value.
Live Specifications, Checked Before Publication
Treat every product figure as model- and revision-specific. If the current product page, manual and physical bike do not agree, leave the value unpublished until it is confirmed.
The Pre-Ride Mud Checklist
Ten confirmations. If one fails, the answer is not today.
- The route is officially open, checked today rather than remembered.
- Soil is firm enough that you will not be the cause of lasting damage.
- Mud depth and base are visible, not assumed.
- Tire and machine baselines confirmed against documentation.
- Controls, brakes and electrical housings inspected and undamaged.
- Conditions sit inside your actual mud experience.
- Recovery plan, riding partner and communication all real.
- Battery reserve protects the trip home, with margin.
- A turnaround point chosen and said out loud.
- Post-ride cleanup time available before the mud dries.
Before You Unload
Mud riding rewards discipline more than technique. Check the closure status, start from documented tire and machine baselines, ride the firmest legal line with smooth inputs, and turn back while the recovery margin still exists rather than after it closes.
Water limits, controls, rider requirements and cleanup steps are model-specific. Read the Valtinsu manual before a wet ride, verify the current product specifications, and do not use an IP code or wheel size as proof that a bike is suitable for a particular muddy route.
Muddy trail, closed gate, empty trailhead. Sometimes that is the whole ride, and it is still the right one.
Compare the Valtinsu electric dirt bike lineup only after confirming route status, rider fit and the exact model’s wet-use limits.
FAQs
Can You Ride an Electric Dirt Bike in the Mud?
Yes, but only on an open motorized route and within the bike’s documented water-exposure limits. The fact that the bike can move through mud does not mean the trail is open or the crossing is safe.
- Choose shallow mud over a firm, visible base.
- Avoid unknown standing water and submerged connectors.
- Stop when wheelspin repeats, ruts deepen, steering becomes vague or self-recovery is doubtful.
Does IPX6 Mean My Electric Dirt Bike Is Waterproof?
No. IPX6 describes performance in a controlled water-jet test; it is not an immersion rating and does not authorize any trail water depth. Seal condition, impact damage, age, open covers and model-specific instructions still matter. Follow the manual and keep the bike out of unknown standing water.
Why Do OHV Trails Close After Rain if the Bike Can Handle Mud?
Because the closure protects the trail, not the motorcycle. Saturated soil can rut, erode and lose its base under knobby tires, creating damage that remains after the surface dries. Follow moisture-based closures and official notices even when the machine itself appears capable.
Can I Pressure Wash an Electric Dirt Bike After a Muddy Ride?
No, unless the exact model manual explicitly permits a specific method. High pressure can drive water past seals and into bearings, connectors, the motor or the battery enclosure.
- Power the bike off and let hot components cool.
- Remove heavy mud with the low-pressure flow, brush and cloth allowed by the manual.
- Keep water away from the charge port, connectors, seals and battery openings.
- Dry and inspect the bike before storage, and never connect the charger while any charging component is wet.
What Are the First Signs I Should Turn Back?
Turn back before traction, control or recovery margin disappears. One serious warning is enough.
- A closure sign, saturated trail or ruts deepening under your tires.
- Tread that packs immediately, repeated wheelspin or steering feedback that disappears.
- A warning code, unusual heat, intermittent power or water near a vulnerable opening.
- Battery reserve below the planned return margin, rising fatigue or a bike you may not be able to lift.
Sources
- USDA Forest Service, Willamette National Forest Rules and Guidelines (2026)
- USDA Forest Service, Uinta-Wasatch-Cache National Forest Road Conditions (2026)
- USDA Forest Service, Tahoe National Forest Foresthill OHV Area (2026)
- USDA Forest Service, Chattahoochee-Oconee National Forest Houston Valley OHV Trails (2026)
- USDA Forest Service, Nebraska National Forests and Grasslands Off-Highway Vehicles (2026)
- TUV SUD, Ingress Protection (IP) Testing, IEC 60529 (2026)
- U.S. Consumer Product Safety Commission, Micromobility Information Center (2026)


Looking for something else?

Electric Dirt Bike Replacement Parts Availability: What Buyers Should Verify Before Ordering
LEARN MORE
How to Check an Electric Dirt Bike for Safety Recalls by Model and Serial Number
LEARN MORE
How to Choose an Electric Dirt Bike Repair Shop: Questions to Ask Before Service
LEARN MORE
How to Lift a Fallen Electric Dirt Bike Without Hurting Yourself or the Bike
LEARN MORELooking for something else?

Electric Dirt Bike Fall Riding on Wet Leaves: Grip, Hidden Obstacles and Braking
LEARN MORE
Electric Dirt Bike Trailside Power Loss: Recovery Plan When the Battery Is Dead
LEARN MORE