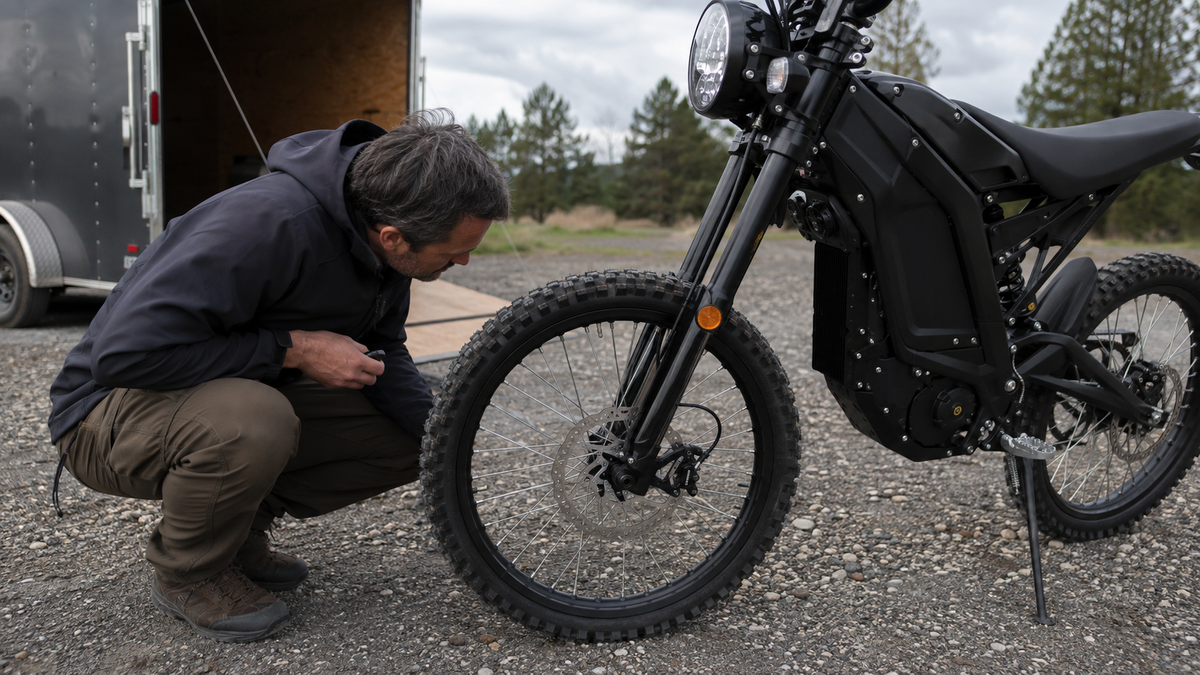
Electric Dirt Bike Brake Rotor Rubbing: Diagnose the Cause Before Adjusting
If an electric dirt bike brake rotor rubs after transport, a wheel installation, or an impact, identify whether the sound is constant or appears once per rotation before adjusting the caliper.
Check wheel seating, spacer placement, axle installation, and visible rotor damage before loosening the caliper. A mis-seated wheel changes the rotor path, so centering the caliper around it can hide the real problem.
Use this order: secure the bike, verify wheel and axle seating, inspect the rotor, check pad spacing and piston return, then assess caliper alignment. Stop for cracks, severe warping, leakage, loose hardware, uncertain axle installation, or braking that remains weak after service.
Quick Answer: Why Is My Electric Dirt Bike Brake Rotor Rubbing?

The rotor is passing too close to a pad. Either the wheel is not seated right, the rotor was bent, the pads moved while the wheel was out, a piston is not retracting, or the caliper is off center.
Start With What Changed
If the noise began after transport, a wheel removal, a crash or brake work, inspect that event first. Wear does not appear overnight.
Do Not Adjust the Caliper Yet
A caliper cannot compensate for a crooked wheel or damaged rotor. Centering around a fault hides it.
Identify the Rubbing Pattern Before Touching Anything

Spin the wheel slowly and listen. The pattern narrows the cause before you pick up a tool.
|
What you hear or feel |
What it usually points to |
Check first |
|
One scrape at the same point each rotation |
Rotor not tracking evenly through the caliper |
Rotor condition and wheel position |
|
Light contact through most of the rotation |
Wheel position, caliper centering or pad position |
Wheel and axle, then pad clearance |
|
Heavy drag, wheel hard to turn by hand |
The brake is partly applied |
Stop. Piston return, pad position, cable preload |
|
Grinding only while braking |
Friction surfaces or debris, not alignment |
Pad condition, rotor damage, contamination |
A Warning About Spinning the Wheel by Hand
Keep fingers, gloves, sleeves, and tools clear of a rotating rotor. Spin the wheel only when the bike is secure and your hands are away from the disc; stop the wheel before making an adjustment.
Check the Wheel and Axle Before the Brake

After transport or wheel service, wheel and axle installation are the first checks because they establish the rotor's position relative to the caliper.
The general sequence is mechanical: the correctly installed wheel establishes the rotor position, and the caliper is aligned only afterward. Follow the exact model's wheel and brake instructions.
Confirm the Wheel Is Fully Seated

Follow your model's wheel installation procedure. Check nothing sits crooked, displaced, or trapped.
If the rotor runs clean until the axle is tightened, stop adjusting the caliper. Recheck wheel seating, spacers, axle sequence, bearings, fork or swingarm alignment, and retention hardware.
Inspect the Axle and Retention Hardware
Look for missing hardware, damaged threads, spacers in the wrong order, and loose retainers. Never guess torque from bolt size.
Rear Wheel Hardware Differs From a Bicycle
These use motorcycle-style hardware: axle blocks, chain adjusters, spacers and a driven rear wheel. Sequence matters more than on a bicycle dropout.
Recheck the Rotor After Correct Installation
Spin it again. If the rubbing has gone, leave the caliper alone.
Inspect the Rotor for Transport or Impact Damage

A rotor can be damaged when transport straps, rack hardware, tools, another machine, or an impact load the disc. Inspect the exact area that was contacted rather than assuming every scrape is caliper misalignment.
Look Through the Caliper as the Wheel Turns
Watch whether the rotor moves toward one pad and away again. A flashlight below the caliper or a white card behind it makes the gap easier to see.
Look for More Than a Simple Bend
Check for cracks, deep scoring, impact marks, heat discoloration, mounting damage and loose rotor hardware.
Do Not Force a Rotor Straight by Hand

Do not straighten a rotor with bare fingers or improvised pliers. Use the brake manufacturer's runout limits and approved correction method, or replace/service the rotor when damage exceeds those limits.
Some rotors tolerate correction with the proper tool and procedure, and some do not. Your brake maker sets the service limit, and Shimano, for instance, specifies replacement once a rotor reaches its stated minimum thickness or the carrier shows through. A cracked or sharply distorted rotor is not rideable, so fit replacement rotors and pad sets specified for your model instead.
Check What Happened While the Wheel Was Out
Wheel-out service is a common trigger for new rub because lever movement, pad spacing, wheel seating, spacers, and axle tightening can all change the rotor-to-pad relationship.
Was the Brake Lever Pulled?
On a hydraulic brake, squeezing the lever with no rotor between the pads moves them closer together. Put the wheel back, and the clearance has gone. Do not force the rotor in.
Was a Pad Spacer Fitted?

An approved pad spacer keeps hydraulic pistons and pads separated while the wheel and rotor are removed. Fit it as the brake manufacturer specifies.
Was the Rotor Protected in Transit?
Straps, hooks, tools, another machine, or a stand leg pressing the disc will bend it. Load so nothing touches it.
Inspect Pad Clearance and Piston Return

Only reach this stage once the wheel and rotor have passed.
Hydraulic Brakes
Look for one pad sitting closer, uneven piston return, contamination, or a lever that feels different.
Do not apply a generic grease or lubricant to caliper pistons. Follow the exact brake maker's cleaning, lubrication, seal, and piston-service instructions; contamination or damage can require professional caliper service.
Cable-Actuated Brakes
For a cable-actuated brake, confirm the actuator returns fully and that cable preload matches the brake maker's setup. Do not assume the same piston or pad movement across brake designs.
Inspect the Pads Themselves
Look for uneven wear, glazing, broken friction material, loose hardware, and contamination.
Use the pad-thickness and wear limits for the exact brake model. A universal millimeter value or wear percentage can be wrong for the fitted caliper.
Check Caliper Alignment Last

With the wheel right and the rotor straight, any remaining offset is genuinely the caliper.
Follow Your Brake Maker's Centering Procedure
Follow the centering method for the exact caliper and mount. Loosening bolts, squeezing the lever, and retightening is not universal, and it cannot correct wheel seating, rotor damage, piston return, or bearing play.
Tighten to the Correct Specification
Use your model's torque figures and sequence. Alternating small increments stops one bolt dragging the caliper off center.
If an assembly diagram shows a torque number without a clear unit, do not guess. Confirm the unit and joint specification with the current manual or support before tightening.
Recheck After Tightening
Caliper position shifts as bolts come up to torque. Verify the final rotor path.
Separate Light Noise From Unsafe Brake Drag
Separate harmless intermittent contact from continuous drag by using the brake maker's clearance, runout, wear, and function criteria—not one generic number.
Occasional Light Contact
Brief, faint contact can occur on some disc systems after a temperature change or wheel refit, but only the manufacturer can define an acceptable condition for the exact brake.
Continuous Drag Is Different
Contact that visibly resists rotation, heats the brake, shortens range, or chews pads needs correcting before you ride.
Do not judge drag by a universal wheel spin time or temperature number borrowed from a bicycle. Use the brake maker's clearance, runout, wear, and function criteria.
Grinding or Changed Lever Feel
Grinding, weaker braking, or a lever traveling farther is a brake fault, not rotor rub. Stop riding until you know why.
Is Rotor Rub Normal on a New Electric Dirt Bike?
Light contact can occur on a new machine, but newness does not prove the wheel, rotor, pads, pistons, or caliper are correctly set.
New Does Not Mean Correctly Assembled

Shipping, final assembly, and wheel installation can all change rotor position. Check clearance and wheel security before the first proper ride regardless of wheel size.
Bedding In Does Not Fix Assembly
New pads and rotors need the maker's bedding procedure. Bedding will not straighten a bent rotor, seat a crooked wheel or free a sticky piston.
Check Before You Ride Hard
Confirm wheel security, rotor condition, lever feel and free rotation. Your manual asks for a brake check before every ride.
Keep Oil and General Lubricants Off the Rotor

Never Spray WD-40 on a Brake
Never apply penetrating oil or general lubricant to a rotor or pads. Friction material can absorb contamination, and contaminated pads often require replacement under the brake maker's procedure.
Use Only Approved Products
Follow only the brake maker's approved cleaning product and method. Adding another solvent or household chemical can spread contamination or damage seals and finishes.
Match Your Scenario to a Shortlist
When it started tells you more than the sound does.
|
It started after |
Check in this order |
|
Transport on a trailer or rack |
Rotor contact damage, wheel seating, axle hardware, pad spacer use |
|
A wheel removal |
Wheel and spacer arrangement, whether the lever was squeezed, then pad position |
|
A crash or rock strike |
Rotor, caliper mount, wheel, axle, fork or swingarm, hose and hardware |
|
Mud or a wash |
Trapped debris and contamination, using the approved cleaning method only |
|
Every adjustment you make |
A root cause alignment cannot fix: rotor damage, piston return, loose or worn parts |
Know When to Stop DIY Brake Work
Four conditions end it.
- Structural damage. A cracked rotor, damaged caliper mount, questionable axle retention, or a compromised fork or swingarm.
- Hydraulic leaks. Fluid at the lever, hose, fittings or caliper needs service, not adjustment.
- Lost braking performance. A lever traveling farther than before, inconsistent braking, or fade on a descent.
- An unknown procedure. These machines mix bicycle-derived and motorcycle-derived brakes. If you cannot confirm the right method, do not improvise on the stopping system.
When any of those apply, book a brake inspection with support and send photos of the rotor, caliper, and axle area, including your order number.
Prevent Rotor Rub During Transport
Three habits reduce the chance of transport-related rotor rub.
Protect the Disc
Position straps, neighboring machines, tools and rack hardware so nothing loads the rotor.
Use the Correct Pad Spacer
Fit the approved spacer whenever a hydraulic wheel comes off, and leave the lever alone until it is back.
Recheck Before You Ride

After unloading, verify wheel installation, axle security, rotor condition, lever feel, and free rotation. Use the same check across models rather than tying it to one wheel size or chassis.
Final Takeaway
Work outward from the wheel: axle, then rotor, then pads and pistons, then the caliper.
Many post-transport cases begin with wheel seating or rotor contact during transport, but do not assume a simple fix. Repeated drag, damaged hardware, a leak, weak braking, or changed lever feel requires service.
FAQs
How do I diagnose a rubbing brake rotor?
Start with wheel seating, spacers, axle installation, and visible rotor damage before adjusting the caliper. The wheel establishes the rotor's path through the caliper.
- Make the bike inert and secure it.
- Check wheel and axle installation against the manual.
- Observe whether contact occurs once per rotation or continuously.
- Inspect pad clearance and piston or cable return.
- Center the caliper only after the earlier causes are ruled out.
Why did the rotor start rubbing after wheel removal?
The wheel may not be fully seated, a spacer may be misplaced, the axle may have been tightened out of sequence, or the brake lever may have been pulled while the rotor was out.
Reinstall the wheel exactly as documented and check the pad gap before loosening caliper bolts. Adjusting around a mis-seated wheel hides the root cause.
How can I tell whether a brake rotor is bent?
A localized scrape that repeats at the same point each revolution suggests lateral runout, but wheel seating and bearing play must be excluded first. Cracks, deep scoring, severe warping, or thickness below the brake maker's limit require replacement.
Do not bend a rotor with bare hands or improvised pliers. Follow the brake manufacturer's inspection and correction limits or use a qualified technician.
Is light brake-pad contact normal?
Brief, light contact can occur, but continuous drag, rapid heat buildup, grinding, reduced braking, or a changed lever feel is not normal. The brake maker's clearance and runout limits take priority over a subjective spin-time test.
If the wheel is difficult to turn by hand or the brake remains partly applied, stop riding and inspect piston return, pad position, cable preload, and hydraulic condition.
Why should caliper alignment be checked last?
Because caliper centering cannot correct a wheel installed in the wrong position, a damaged rotor, misplaced spacers, bearing play, or a piston that will not retract.
Once the wheel and rotor path are correct, follow the exact brake maker's centering method and tightening specification, then recheck rotation and lever feel.
Can I spray lubricant on a rubbing or squealing rotor?
No. General lubricants and penetrating oils reduce brake friction and can permanently contaminate pads.
Use only the cleaning product and method approved by the brake manufacturer. Contaminated pads generally require replacement, while rotors may be cleanable only as the maker specifies.
Sources
- Shimano, General Dealer's Manual: Disc Brake Safety and Inspection
- Park Tool, Shimano Hydraulic Brake Service and Adjustment (2023)
- Shimano, Dealer's Manual: Hydraulic Disc Brake, DM-MDBR001 (Shimano Inc.)
- SRAM, G2 RS and G2 R Service Manual (2022)
- Motorcycle Safety Foundation, T-CLOCS Pre-Ride Inspection Checklist (MSF)
- SRAM, Mineral Oil MTB Disc Brake Service Manual
- SRAM, DOT Fluid MTB Disc Brake Service Manual


Looking for something else?

Electric Dirt Bike Replacement Parts Availability: What Buyers Should Verify Before Ordering
LEARN MORE
How to Check an Electric Dirt Bike for Safety Recalls by Model and Serial Number
LEARN MORE
How to Choose an Electric Dirt Bike Repair Shop: Questions to Ask Before Service
LEARN MORE
How to Lift a Fallen Electric Dirt Bike Without Hurting Yourself or the Bike
LEARN MORELooking for something else?

Electric Dirt Bike Fall Riding on Wet Leaves: Grip, Hidden Obstacles and Braking
LEARN MORE
Electric Dirt Bike Trailside Power Loss: Recovery Plan When the Battery Is Dead
LEARN MORE