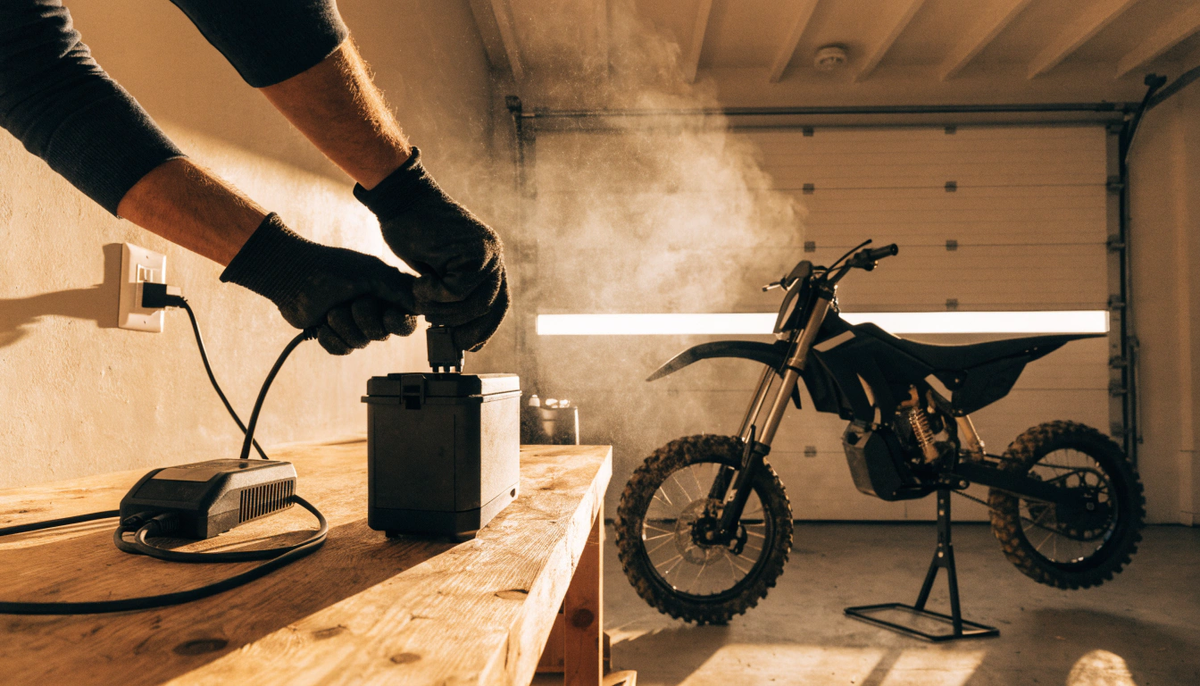
Electric Bike Battery Not Charging? Work Through This Before You Buy a New One
When an electric bike battery will not charge, check the outlet, approved charger, cables, charge port, battery seating, temperature, and displayed fault information before blaming the pack. The battery may still be the cause, but the symptom alone cannot prove it.
This order avoids an unnecessary battery purchase and helps identify conditions that make charging unsafe.
There is a second problem with the advice out there. Plenty of it tells you to open the enclosure, probe cell groups, or charge cells one at a time.
Do not open the pack, bypass the BMS, probe cell groups, improvise a charger, or charge through discharge leads. Stop immediately for swelling, hissing, odor, leaking, impact damage, unusual heat, smoke, or a scorched connector, and follow the manufacturer's isolation and service guidance.U.S. Consumer Product Safety Commission
So this guide runs in a strict order, from the wall socket inward, and stops at the battery case. It works for a commuter bike and for an adult electric off-road motorcycle like the EM-5 Pro, because the diagnostic sequence is the same on both.
Quick Answer: Why Is Your Electric Bike Battery Not Charging?

Common external causes include a dead outlet, damaged charger or cable, a dirty or damaged charge port, incomplete battery seating, a pack outside its approved charging-temperature range, or a protection state. Diagnose from the outlet inward.
Internal cell failure exists. It is just far down the list.
Run the checks in this order and stop as soon as charging starts:
- Prove the wall outlet works with another device
- Inspect the charger, both cables, and the indicator light
- Confirm the charger is the approved one for your exact battery
- Look into the charge port for dirt, moisture, or bent pins
- Reseat and lock the battery, then check the display
- Bring the pack to its approved charging temperature and retry
- Read any fault code, then follow the documented reset if one exists
- Record what you saw and contact support
Work From the Outlet Inward
Check low-risk external causes before considering battery replacement.
Every step above is reversible, and none of it requires tools you do not own. If charging has not started by step seven, you have gathered real evidence rather than guesses.
Charger Lights Are Clues, Not Verdicts
Charger LED colors are not standardized. Interpret the light only with the instructions for the exact matched charger.
Read your charger manual before interpreting anything. A blog post about a different brand tells you nothing here.
Never Open the Battery to Diagnose It
A lithium-ion battery contains high-energy cell groups and protection electronics. Owner checks should remain external; never open the enclosure to diagnose a charging problem.
Everything below stays outside that enclosure. That is deliberate.
Stop and Get Help If You See Any of These

Some symptoms end the troubleshooting instead of continuing it. If you can do so safely, disconnect, move the pack away from anything that can burn, and contact support.
- Swelling, cracks, or a case that no longer sits flat. A deformed pack does not go back on the charger, no matter how it charged yesterday.
- Heat that is more than warm, a hissing or popping sound, smoke, or a sharp chemical smell.
- Blackened, pitted, or melted charge contacts. That is arcing damage, and pushing more current through it makes it worse.
- The bike went underwater, or took a heavy impact, and has not been checked since.
NFPA guidance on these batteries is short and worth following: stop using a device that gets hot, smells strange, makes popping noises, or changes shape, and never charge where the exit is blocked (NFPA).
None of that is dramatic. It is just the point where a cheap fix stops being available.
Name the Exact Symptom Before You Fix Anything
Five different faults get called the same thing. They have different causes, so start by working out which one you have.
|
What you see |
What it usually points to |
|
Nothing happens; no charger light or bike response |
Outlet, charger input, charger fault, or a damaged lead |
|
Charger lights up but charging never begins |
Port contact, battery seating, temperature, protection state, or charger mismatch |
|
Charges for a few minutes, then stops |
Near-full state, temperature or protection response, connection loss, or a persistent battery-side fault |
|
Charger reports full, gauge does not move |
Indicator interpretation, poor contact, charger mismatch, or display/communication behavior |
|
Charges fine, bike will not run |
Not necessarily a charging fault; inspect the discharge path and model-specific drive-enable conditions |
Nothing Happens At All
Start at the wall. A switched outlet, a tripped breaker, and a tired power strip all look identical to a dead battery.
Then the leads. Charger cables carry dozens of thin copper strands, and vibration snaps them one at a time until the last one goes. The outside often looks perfect.
The Charger Powers Up but Charging Never Starts
The charger is fine, and the connection or the battery state is not. Work the port, the seating, and the temperature in that order.
It Charges for a Few Minutes, Then Stops
This one is worth documenting carefully. Note the charge level it started from, whether the pack or charger got hot, and whether the same thing happens from a low state of charge.
A pack stopping five minutes into a charge at 90 percent is normal. The same behavior at 10 percent is not.
The Charger Says Full, but the Gauge Does Not Move
Treat this as a current-flow problem, not a full battery. Something in the path is stopping meaningful current, and the charger has interpreted that as a finished job.
It Charges Fine but the Bike Will Not Run
Different problem entirely. Charging and delivering power under load are separate functions, and a pack can pass one and fail the other. There is a section on this further down.
Check the Outlet, the Charger and Both Cables

Ten minutes here resolves a large share of cases.
Prove the Outlet Works
Plug in a lamp or a phone charger. Check the breaker. Skip extension leads and power strips for the test, and plug the charger straight into the wall.
Inspect the Charger Housing and Both Leads
Look for cracked insulation, a bent wall plug, a loose strain relief where the cable meets the body, scorch marks, or a housing that runs hotter than usual.
Flex each cable gently along its length while it is unplugged. A cable that only fails at one angle is a broken conductor inside intact insulation.
Read the Indicator Against the Manual, Not a Blog

Every charger defines its own LED states. Find them in the charging section of your model manual and match what you are seeing to the manufacturer definition rather than a generic red-means-charging rule.
A charger that reaches its documented finished state much sooner than expected is a clue, not a diagnosis. Record the elapsed time, starting charge level, charger indicator sequence, and battery state for support.
Why a Universal Charger Is the Wrong Fix

A universal or connector-adapted charger can appear convenient, but matching the plug or nominal voltage is not enough to establish compatibility. The CPSC warns that incompatible universal micromobility chargers can ignite batteries.
Charging voltage, current profile, polarity, connector pinout, communication, and protection behavior must all match the exact battery system.
Nominal Voltage Does Not Tell You the Charging Voltage
Nominal pack voltage does not specify the correct charger by itself. Cell configuration and the system's charging design determine the required output and profile.
Use the battery label, charger output label, exact model manual, and manufacturer guidance together. Do not infer the charger from a generic voltage-conversion chart.
|
Model |
Published battery system |
Charger selection |
Charging-time source |
|
EM-5 |
48V 23.4Ah |
Use only the exact supplied or manufacturer-approved matched charger; confirm the output label |
Verify the current model manual or support guidance |
|
EM-5 Pro |
60V 27Ah |
Use only the exact supplied or manufacturer-approved matched charger; confirm the output label |
Verify the current model manual or support guidance |
|
EM-5 Ultra |
72V 25Ah |
Use only the exact supplied or manufacturer-approved matched charger; confirm the output label |
Verify the current model manual or support guidance |
|
EM23 |
60V 27Ah |
Use only the exact supplied or manufacturer-approved matched charger; confirm the output label |
Verify the current model manual or support guidance |
This table records the published battery systems only; it deliberately directs charger selection and charging time back to the exact current manual or support guidance.
The Charger Is Part of the Matched System
Use only the supplied or manufacturer-approved charger for the exact battery system. Do not claim a specific UL 2849 certification unless the product's certification documentation explicitly identifies that standard and system.
A plug that fits is not evidence of compatibility. Both NFPA and CPSC give the same instruction on this point: use only the charger supplied with the product or one the manufacturer recommends.
Never Adapt a Connector or Reverse Polarity

Do not repin, splice, adapt, or force a connector. Obtain the exact charger specified for the battery and model through an approved source.
One reversed connection can end a pack permanently, and occasionally it does worse than that.
Inspect the Charge Port Without Opening Anything

Use a light and visual inspection only, with the bike and charger disconnected. The charge port can explain a no-charge symptom without opening the battery.
Dirt and Debris
Trail dust, grit, and dried mud all pack into a port. Clear it with dry compressed air held at a distance. Nothing metal goes into a charge port, ever.
Bent or Recessed Pins
Compare the port with a prior photo if available. A plug that suddenly feels different, sits loose, or will not align can indicate a bent or recessed contact; do not force it.
Do not force it. Forcing a misaligned pin turns a warranty repair into a replacement.
Moisture and Corrosion
Never charge through a wet socket. Green or white residue, pitting, heat discoloration, looseness, or arcing marks require service rather than cleaning experiments.
Dry the port fully and let it sit before trying again. Riding in rain then charging within the hour is a common cause.
Heat Damage or Arcing Means Stop
Darkened plastic, pitted contacts, or a port that runs warm during charging is past cleaning. That gets looked at rather than persisted with.
Confirm the Battery Is Seated, Locked, and Awake

Battery seating is a high-value check because a pack can appear installed before the locking mechanism and electrical interface are fully engaged.
Seating and Lock
A removable pack can look installed while the locking mechanism has not fully engaged. The charger then powers up normally, finds no load, and reports itself finished.
Remove it and refit it deliberately. Listen for the lock. Check nothing has bent around the cradle.
Key, Switch and Display State
Some models require a documented key, switch, or display state before charging indicators behave normally. Confirm the exact model's sequence instead of using gear zero or another model's display behavior as a universal test.
Transport or Storage Mode
A new battery can ship in a transport state that needs a defined activation step. If the bike is fresh out of the box and nothing responds, check that before you suspect a fault.
Do Not Hunt for Hidden Reset Buttons
Do not poke an unlabelled opening or search for a secret reset hole. Use only a switch, button, or wake procedure identified in the exact manual.
Use documented controls only.
Let the Pack Reach Its Approved Charging Temperature

A pack outside its approved charging-temperature range can refuse charge even when the charger and port are healthy.
A Hot Pack After a Ride
After a demanding ride, a battery may need to cool before it accepts charge. Do not charge a pack that is unusually hot, swollen, damaged, producing odor or noise, or showing any other warning sign.
Let the pack return naturally to the exact model's approved charging-temperature range before connecting the matched charger. Do not impose a generic waiting time.
A Cold Pack in Winter
Lithium-ion batteries should be charged only within the temperature range specified for the exact battery system. Charging below the permitted range can damage cells even when the enclosure looks normal.
A pack may block charging when it is outside its approved temperature range. Confirm the exact limits; do not treat protection as proof of cell failure.
Do not repurpose a general operating-temperature figure as a charging limit. Use the charging range stated for the exact battery, charger, and manual revision, or obtain it from support.
Warm It Up Slowly, and Never Artificially

Bring the pack indoors and let it come up to room temperature on its own: no heater, no hair dryer, no heat gun, no airing cupboard. If you want the background on why packs behave this way, we cover voltage, amp-hours,and watt-hours explained separately.
Natural temperature equalization is slower than improvised heating, but it avoids local hot spots and damage to the pack or enclosure.
What a Green Charger Light Actually Means

The charger indicator is a clue that must be interpreted alongside the manual, battery state, and connection condition.
Green Is Not a Universal "Full"
Depending on the exact matched charger, green may mean standby, charge complete, no battery detected, or another documented state.
Do not assume an immediate green light proves either a full battery or a failed charger. Confirm seating, port condition, charger match, and the documented indicator behavior.
Compare the Charger State With the Display
The charger says finished, but the bike display says 20 percent. Write both down. Two readings that disagree are far more useful to support than repeatedly unplugging and replugging.
Suspect the Connection Before the Cells
A charger that cannot make the expected connection may never enter its charging state at all. Recheck the port and the seating before you conclude anything about the battery.
Read the Display Code Before You Guess

If the bike displays a status code, photograph it before cycling power. Then confirm the definition against the exact model and manual revision.
The error-code table below comes from the cited EM-5 manual revision. Do not apply it automatically to EM-5 Pro, EM-5 Ultra, EM23, or different display firmware.
|
Code |
Meaning in the cited EM-5 manual |
First interpretation when charging fails |
|
E00 |
Normal status |
No fault reported. Look at the outlet, charger, and port |
|
E06 |
Battery undervoltage |
The pack has dropped low. Follow the documented recovery process; do not improvise one |
|
E09 |
Controller failure |
A controller or power-electronics branch may be involved; the code alone does not diagnose the no-charge condition |
|
E010 / E011 |
Communication reception or transmission failure |
A wiring or connector fault can look exactly like a dead battery |
|
E012 |
BMS communication failure |
The protection board and the system are not talking. This needs service, not a reset loop |
Photograph the code before you clear it. It is the single most useful thing you can give a technician.
Charging Stops After a Few Minutes: What That Pattern Means

When charging stops after a few minutes, record the starting charge level, battery temperature, charger indicator sequence, and any code. Those observations separate near-full behavior, heat or cold protection, connection loss, and a persistent fault.
The same behavior from two genuinely approved chargers makes a battery-side or connection issue more plausible, but it still does not justify opening the pack or bypassing protection.
Note the Starting Charge Level
Diagnostically, this is the key number. Stopping at a high state of charge is often correct behavior. Stopping from nearly empty is not.
Note Heat and Any Code
Record whether the pack and charger are within their documented temperature limits and note any code. Stop for abnormal heat, odor, swelling, leakage, smoke, popping, or visible port damage; do not handle a hot or smoking pack.
Two Approved Chargers, Same Fault
If both units are genuinely approved for that battery and both stop the same way, battery-side protection or an internal fault becomes likely.
That is a conclusion to report, not a reason to reach for a screwdriver.
Can the BMS Block Charging?
Yes, routinely, and that is the point of it.
What the Protection Board Watches
Cell voltages, current, temperature, and short-circuit conditions, according to how the system was designed. When something falls outside limits, it opens the circuit.
Protection Is Information, Not a Fault to Defeat
A pack that refuses charge after an abnormal event is reporting that event. The refusal is the message.
Bypassing, jumpering, or replacing the protection board to force a charge removes the only thing standing between a damaged cell and a fire.
Internal Work Is Not an Owner-Level Reset
Do not open the case, disconnect internal leads, or probe cell groups. Internal reset and battery-management work require the manufacturer or a qualified battery technician.
How to Wake or Reset a Battery Safely
A battery wake or reset must come from the exact manual. Generic procedures are unreliable because protection and communication designs differ.
Use Only a Documented Procedure
Some batteries wake with a button hold. Some need the charger connected for a set period. Some have an app step. And plenty have no user-accessible reset at all.
Find yours in the manual. If there is no documented procedure, there is no procedure.
Deep Discharge Is Not an Invitation to Improvise
A pack left flat for months may have locked itself into low-voltage protection. Sometimes an approved recovery process brings it back.
Do not use a bench supply, mismatched charger, low-voltage adapter, or cell-by-cell charging. These methods can bypass system protections and create a fire hazard.
A Pack That Will Not Wake Needs Diagnosis
If the pack remains unresponsive after the documented external steps, service is needed to distinguish a protection state, damaged cell group, failed battery electronics, charger fault, or communication problem.
Fuses, Meters and the Line Not to Cross

Both of these are useful within limits, and both get pushed past those limits constantly.
Only an Externally Accessible Fuse
Some packs have an owner-serviceable charging fuse behind an external cover, clearly marked. If yours does and the manual describes replacing it, that is fair game with the exact specified rating.
An internal fuse is not an owner-service item. Replace only an externally accessible fuse when the exact manual identifies it and gives the required type and rating.
Charger Output Testing
A multimeter can check charger output where the manufacturer publishes an accessible test point and a target figure. Use their number, not one from a chart.
Never probe cell groups, balance leads, or protection board terminals.
Resting Voltage Proves Very Little
A pack can read its expected voltage at rest and still collapse the moment load arrives. Normal voltage is not a clean bill of health, and it is not a reason to keep charging a suspect battery.
When the Problem Is Not the Charging System
Sometimes charging works perfectly, and the bike still will not go.
It Charges but the Bike Will Not Run
Charging and discharging are separate paths. A pack can accept a full charge and still fail to deliver current under load, and the fix is a different diagnosis entirely.
Look at What Else Powers On
Does the display light? Do the lights work? Is there a code? Those answers separate a battery output problem from a controller or startup problem faster than anything else.
Battery Age Comes Last, Not First

Battery aging usually appears gradually as reduced range or changing charge behavior. A sudden no-charge condition still requires the same outlet-to-pack diagnosis rather than immediate replacement.
We break down how long these packs actually last, and what drives it is charge habits and heat far more than calendar age.
What to Send Support So They Can Actually Help

Support can move fast with evidence and slowly without it. Gather this before you write.
- Charger behavior. Which LED, whether charging starts, how long before it stops, any noise or unusual heat.
- Battery state. Displayed charge level, any fault code, whether the bike powers on, roughly how warm the pack is.
- Photos. The charge port, the charger label, the battery case, the display showing the code. Take them before you clean or change anything.
- Recent history. Long storage, a wash, a crash, a new charger, a deep discharge, a very hot or very cold spell. Any of these narrow it down quickly.
- Purchase details. Order number and date, because they determine your options.
Check the current warranty terms before opening, modifying, or replacing parts. Document the fault and preserve labels, serial information, and photos.
Conclusion
An electric bike battery that will not charge is a sequence problem, not a mystery. Outlet, charger, cables, port, seating, temperature, fault code, then support.
Two rules make the whole thing safe. Use only the charger specified for your exact battery, and stop at the battery enclosure.
Following the order prevents unnecessary battery replacement and preserves the evidence needed for service.
Keep the Charger Matched to the Battery
Label the charger with its model, output specification, and matching bike or battery. Store it dry and separate from visually similar chargers.
- Before each charge, compare the charger label with the battery documentation, inspect both leads and the port, and confirm the pack is within its approved charging-temperature range.
- If a replacement is needed, use the exact approved charger. Current price, shipping, and promotional terms do not belong in a troubleshooting decision.
- Do not use a universal charger, homemade adapter, or altered connector even if the plug fits.
This simple labeling and inspection routine prevents charger mix-ups while keeping the article focused on the reader's no-charge problem.
One action to take today: photograph the charger and battery labels together, then save the image with your model and serial information.
FAQs
Why is my electric bike battery not charging?
Start with the outlet, matched charger and cables, charge port, battery seating, and pack temperature. Internal battery failure is possible, but it should not be the first assumption.
- Confirm the outlet with another known-good device.
- Verify the charger label matches the exact battery and bike documentation.
- Inspect the dry, unpowered port for damage or contamination.
- Let the pack return to its approved charging-temperature range.
- Record the charger indicator and any display code before contacting support.
Why is the charger light green but the battery is not charging?
Green is not a universal diagnosis. Depending on the matched charger, it may mean standby, charge complete, no battery detected, or another documented state.
Compare the indicator with the charger manual and the bike's state-of-charge display. Check seating and the port before assuming the cells are full or the charger has failed.
Can I use a universal charger with an electric dirt bike?
No. Use only the charger supplied or approved for the exact battery system.
Matching the connector or nominal voltage is not enough; charging voltage, current, polarity, communication, and protection behavior must all match. The CPSC warns that incompatible universal micromobility chargers can cause battery fires.
How do I wake or reset an electric bike battery?
There is no universal reset. Follow only the normal charging, key, battery-removal, or wake procedure documented for the exact model.
Do not open the pack, probe cell groups, use a bench supply, short terminals, or connect a mismatched charger. A pack that remains unresponsive needs manufacturer or qualified battery service.
Why does charging stop after a few minutes?
The pack may be near full, outside its charging-temperature range, losing contact, or entering protection. The indicator sequence, starting charge level, temperature, and any code are needed to separate those possibilities.
Stop immediately for abnormal heat, odor, swelling, leakage, smoke, popping, or visible port damage. Do not restart charging to see whether the warning repeats.
Does E06 mean I should force-charge the battery?
No. In the cited EM-5 manual, E06 reports battery undervoltage; it does not authorize a universal recovery method.
Confirm the code definition for the exact model and use only its documented recovery or service route. A different model or display revision may not use the same code table.
Sources
- U.S. Consumer Product Safety Commission, Micromobility Information Center (2026)
- NFPA, E-Bike and E-Scooter Safety (2026)
- NFPA, Lithium-Ion Battery Safety (2026)
- Battery University, BU-410: Charging at High and Low Temperatures (2026)
- U.S. CPSC, Warning Against Incompatible Universal Micromobility Chargers
- Valtinsu, Electric Dirt Bike Collection and Current Battery Specifications
- Valtinsu, EM-5 Owner Manual


Looking for something else?

Electric Dirt Bike Replacement Parts Availability: What Buyers Should Verify Before Ordering
LEARN MORE
How to Check an Electric Dirt Bike for Safety Recalls by Model and Serial Number
LEARN MORE
How to Choose an Electric Dirt Bike Repair Shop: Questions to Ask Before Service
LEARN MORE
How to Lift a Fallen Electric Dirt Bike Without Hurting Yourself or the Bike
LEARN MORELooking for something else?

Electric Dirt Bike Fall Riding on Wet Leaves: Grip, Hidden Obstacles and Braking
LEARN MORE
Electric Dirt Bike Trailside Power Loss: Recovery Plan When the Battery Is Dead
LEARN MORE